Configuration by the Serial Console
Serial Port Server (C20 - C25)
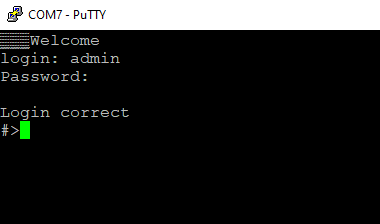
Another way to configure the device is via a serial console. In case of the C20 - C22 Ethernet Converters an additional USB/UART converter is needed.
Procedure to enter serial console mode on C20 - C22
- Turn off the power of the device.
- Connect the PC to the C1 micro-USB port of Ethernet converter using the dedicated USB/UART converter.
- Open the serial console (default baud rate is 115200 bps).
- Press and hold the S1 button (or connect Din pin to GND pin if the button is not mounted).
- Turn on the power and wait a few seconds until the orange LED lights up.
- Release the button (or disconnect Din pin from GND pin).
Procedure to enter serial console mode on C23 - C25
- Install STM32 Virtual COM Port Driver.
- Turn off the power of the device.
- Connect the PC to the C1 micro-USB port using the USB cable (or use the dedicated USB/UART converter).
- Open the serial console (default baud rate is 115200 bps).
- Press and hold the S1 button.
- Turn on the power and wait a few seconds until the yellow CN LED lights up.
- Release the button (or disconnect Din pin from GND pin).
List of all commands
|
Command |
Description |
|
help |
Print the help. |
|
conn |
Print active TCP connections. |
|
eth_mac |
Print or change MAC address. |
|
exit |
Close current CLI session. |
|
http_port |
Print or change default http port. |
|
ipconfig |
Print or change the network configuration. |
|
net_hostname |
Print or change the hostname. |
|
udp_broadcast |
Print or turns the UDP broadcast on or off. |
|
net_stat |
Print lwIP statistics. |
|
ping |
Check internet connection with the desired host. |
|
defaults |
Reset application variables to defaults. |
|
restart |
Restart the system. |
|
reboot |
Same as restart. |
|
sys_heap_usage |
Print current heap usage. |
|
telnet_port |
Print or change default telnet port. |
|
uart |
Print or change uart configuration. |
|
uart_service |
Print or change uart_service configuration. |
|
user |
Print or change user configuration. |
Ports configuration commands
In terms of ports configuration it is possible to change parameters like: service, baud rate, data bits, parity, stop bits and so on. UART commands are provided below.
- uart
- uart help
Print the help message. - uart list
List available uarts in the system.
Example:
uart list
0: baud: 9600 bits: 8 stop_bits: 1 parity: none (service console)
1: baud: 115200 bits: 8 stop_bits: 2 parity: odd (covered by cons.)
2: baud: 9600 bits: 8 stop_bits: 1 parity: none
3: baud: 1200 bits: 8 stop_bits: 2 parity: even termination: ON (R-COM)
3: baud: 38400 bits: 8 stop_bits: 2 parity: none termination: OFF - uart PORT_NUMBER baud BAUD
Set PORT_NUMBER baudrate to BAUD. BAUD value can be one of the following:
2400, 4800, 9600, 14400, 19200, 38400, 57600, 115200.
Example:
uart 1 baud 9600
WARNING: UART covered by console. Changes will take place after the reset. - uart PORT_NUMBER bits BITS
Set bit length to BITS. BITS value can be one only 8.
Example:
uart 2 bits 8 - uart PORT_NUMBER stop_bits STOP_BITS
Set stop_bits length to STOP_BITS. STOP_BITS value can be only 1 or 2.
Example:
uart 2 stop_bits 1 - uart PORT_NUMBER parity PARITY
Set uart parity to PARITY. PARITY value can be one of the following: none, odd, even.
Example:
uart 3 parity even - uart PORT_NUMBER termination STATE
Set uart termination to new STATE. STATE can be only ON or OFF.
Example:
uart 3 termination ON
- uart help
- uart_service
-
- uart_service help
Print the help message. - uart_service list
List of uarts services status.
Example:
uart_service list
1 state: ON service: Remote COM port: 1504 enc: YES
2 state: OFF service: TCP Socket port: 1510
3 state: OFF service: UDP Socket port: 1510 - uart_service UART_NUMBER state STATE
Set UART_NUMBER state to STATE. STATE value can be only ON or OFF.
Example:
uart_service 1 state ON - uart_service UART_NUMBER service SERVICE
Set UART_NUMBER service to SERVICE. SERVICE value can be one of the following: Remote COM, TCP Socket, UDP Socket.
Example:
uart_service 1 service TCP Socket - uart_service UART_NUMBER port PORT_NUMBER
Set UART_NUMBER port to PORT_NUMBER. PORT_NUMBER value can be any in the range: 1-65535.
Example:
uart_service 1 port 1501 - uart_service UART_NUMBER enc ENC_STATE
Set UART_NUMBER encryption to ENC_STATE. ENC_STATE can be only YES or NO.
Example:
uart_service 1 enc YES
If ENC_STATE is YES then it will ask for a new password for encryption.
- uart_service help
-
Network settings
The following commands might be helpful to change network settings according to target LAN parameters.
- ipconfig
- ipconfig addr ADDRESS
Set IP address to ADDRESS.
Example:
ipconfig addr 192.168.0.10 - ipconfig mask NETMASK
Set subnet mask to NETMASK (in dot-decimal format).
Example:
ipconfig mask 255.255.255.0 - ipconfig mask BIT_COUNT
Set subnet mask to BIT_COUNT bits.
Example:
ipconfig mask 24 - ipconfig gateway GATEWAY_IP
Set network gateway to GATEWAY_IP.
Example:
ipconfig gateway 192.168.0.1 - ipconfig dhcp enable/disable
Enable or disable DHCP client.
Example:
ipconfig dhcp enable - ipconfig dns1 ADDRESS
Set primary DNS to ADDRESS, disable getting DNS from DHCP if enabled.
Example:
ipconfig dns1 192.168.100.1 - ipconfig dns2 ADDRESS
Set secondary DNS to ADDRESS, disable getting DNS from DHCP if enabled.
Example:
ipconfig dns2 1.1.1.1
- ipconfig addr ADDRESS
- eth_mac
- eth_mac help
Print the help message. - eth_mac default
Set device’s MAC address to factory-default one. - eth_mac set MAC_ADDR
Set device’s MAC address to MAC_ADDR. Accepts both dash and colon-separated formats.
Example:
eth_mac set 01-02-03-04-05-06
Example:
eth_mac set 01:02:03:04:05:06
- eth_mac help
- http_port
- http_port help
Print the help message. - http_port PORT_NUMBER
Set http port to PORT_NUMBER. A PORT_NUMBER value must be in range: 1-65535.
Example:
http_port 80 - http_port status
Print current http port.
Example:
http_port status
A current http port is 80
- http_port help
- telnet_port
-
- telnet_port help
Print the help message. - telnet_port PORT_NUMBER
Set Telnet port to PORT_NUMBER. A PORT_NUMBER value must be in range: 1-65535.
Example:
telnet_port 23 - telnet_port status
Print current Telnet port.
Example:
telnet_port status
A current telnet port is 23
- telnet_port help
-
Changing username or password
To change username or password, use user command. Available commands:
- user help
Print the help message. - user mod_name USER_NAME NEW_NAME
Change the user name to NEW_NAME. It fails if the name is used by another user.
Example:
user mod_name admin john - user passwd USER_NAME
Change USER_NAME's password.
Example:
user passwd admin
****** <- here is entered password, but '*' appears instead
Note: Everyone can change the password for themselves.
Service mode
Procedure to enter service mode for C20 - C22 converters
- Turn off the power of the device.
- Connect Ethernet converter to the dedicated USB/UART converter via the microUSB port.
- Connect the USB/UART converter to the PC.
- Open the serial console (default baud rate is 115200 bps).
- Press and hold the S1 button.
- Turn on the power.
- Wait until the ST indicator (red LED) lights up.
- Release the S1 button.
- If the process is successful, service commands can be typed into the terminal.
Procedure to enter service mode for C23 - C25 converters
- Install STM32 Virtual COM Port Driver (if it was not done before).
- Turn off the power of the device.
- Connect Ethernet converter directly to the PC (the dedicated USB/UART converter is not obligatory).
- Open the serial console (default baud rate is 115200 bps).
- Press and hold the S1 button.
- Turn on the power.
- Wait until the ST indicator (red LED) lights up.
- Release the S1 button.
- If the process is successful, service commands can be typed into the terminal.
List of commands in the service mode
|
Command |
Description |
|
help |
Print the help. |
|
credits |
Print current credits value for this device. |
|
dev_ident |
Print the device identification value. |
|
restart |
Restart the system. |
|
serial_num |
Print the serial number of this device. |
|
version |
Display the bootloader version. |
|
xmodem |
Download image to the internal flash using xmodem. |
|
defaults |
Reset application variables to defaults. |
|
ipconfig |
Print or change the network configuration. |
|
flash_read |
Read bytes from flash memory. |
|
md |
Read bytes from memory address. |
In the service mode, the “ipconfig” command can only show a last static IP address.
Factory reset
To restore default settings, type “defaults”. After that, user will be asked to type “default network” to reset the network settings as well. Then user will be informed if the process is successful.
Default login details:
- login: admin
- password: admin123
- IP: 192.168.100.100
Additional notes
In order to avoid issues like connecting to host, type “help” to get more information.
To get more details about every particular command, append “help” after each commands (example: "ipconfig help").