Software Examples
How to Use?
Tiger City IMX Industrial Computer with Linux OS
Tiger computer is provided with some basic software examples that can be used as a starting point for developing custom programs.
The examples are available in:
- C
- Python
- Bash
The examples are divided into categories:
C examples
Examples written in C can be built with CMake. Put your source files into one folder and specify its name (${SRC_DIR} dir_name). Then create a CMakeLists.txt file in the parent directory (an example of this file is provided below).
In the parent directory create a new folder named "build" and enter it:
mkdir build && cd buildNext, configure your project using:
cmake ..Then build your project with:
cmake --build .After that, executable files should appear in the same folder.
./file_namePython examples
In order to execute Python files, go to the desired directory and type:
python3 file_name.pyBash examples
In order to execute Bash files, go to the desired directory and type:
bash file_name.shExternal Interfaces
Tiger City IMX Industrial Computer with Linux OS
DIO read
This example shows how to use DIO (Digital Input Output) of the Tiger computer in the read mode. After running the program, the state of every DIO will be displayed.
Connections
In order to test, the program uses H1 - H7 pins (diagram provided at the bottom of this page).
DIO write
This example shows how to use DIO (Digital Input Output) of the Tiger computer in the write mode.
Connections
In order to test, the program uses H1 - H7 pins (diagram provided at the bottom of this page).
DI read
This example shows how to read the states of the DI (Digital Input) of the Tiger computer. After running the program, the state of every DI will be displayed.
Connections
In order to test, the program uses D1 - D5 pins (diagram provided at the bottom of this page).
ETHERNET
This example shows how to check the Ethernet port connection of the Tiger computer.
Connections
In order to test, the program uses the RJ45 port (diagram provided at the bottom of this page).
1-WIRE
This example shows how to read temperature from the DS18B20+ sensor using the 1-Wire bus of the Tiger computer.
Connections
In order to test, the program uses 1W, 5V and GND pins (diagram provided at the bottom of this page).
RS232
This example shows how to write to and read from the RS232 interface of the Tiger computer.
This example won’t work in the loopback connection test - an external serial monitor is needed.
Connections
In order to test, the program uses T1, R1, T2, R2 and GND pins (diagram provided at the bottom of this page).
RS485
This example shows how to write to and read from the RS485 interface of the Tiger computer.
This example won’t work in the loopback connection test - an external serial monitor is needed.
Connections
In order to test, the program uses A1 - A4, B1 - B4 and GND pins (diagram provided at the bottom of this page).
UIO AI 10 V
This example shows how to use the UIO (Universal Input Output) of the Tiger computer as a voltage AI (Analog Input).
Connections
In order to test, the program uses U1 - U4 pins (diagram provided at the bottom of this page).
UIO AI 20 mA
This example shows how to use the UIO (Universal Input Output) of the Tiger computer as a current AI (Analog Input).
Connections
In order to test, the program uses U1 - U4 pins (diagram provided at the bottom of this page).
UIO AO
This example shows how to use the UIO (Universal Input Output) of the Tiger computer as an AO (Analog Output).
Connections
In order to test, the program uses U1 - U4 pins (diagram provided at the bottom of this page).
UIO DI
This example shows how to use the UIO (Universal Input Output) of the Tiger computer as a DI (Digital Input).
Connections
In order to test, the program uses U1 - U4 pins (diagram provided at the bottom of this page).
USB
This example shows how to open, write to, and read from a USB device plugged into the Tiger computer.
Connections
In order to test, the program uses the USB port (diagram provided at the bottom of this page).
Wi-Fi
This example shows how to connect the Tiger computer to a Wi-Fi access point.
Ports diagram

Internal Devices
Tiger City IMX Industrial Computer with Linux OS
Buzzer
This example shows how to use the integrated buzzer of the Tiger computer. The buzzer will generate a sound for a few seconds and then turn itself off.
EEPROM erase
This example shows how to erase the EEPROM memory of the Tiger computer.
EEPROM read
This example shows how to read from the EEPROM memory of the Tiger computer.
EEPROM SN read
This example shows how to read from the EEPROM SN (read-only) memory of the Tiger computer.
EEPROM write
This example shows how to write some sample string to the EEPROM memory of the Tiger computer.
FLASH erase
This example shows how to erase the FLASH memory of the Tiger computer.
FLASH read
This example shows how to read from the FLASH memory of the Tiger computer.
FLASH write
This example shows how to write some sample string to the FLASH memory of the Tiger computer.
GSM reset
This example shows how to reset the GSM module of the Tiger computer.
RTC
This example shows how to read date and time from the RTC (Real Time Clock) of the Tiger computer.
Watchdog
This example shows how to view the watchdog service status of the Tiger computer.
Front Panel
Tiger City IMX Industrial Computer with Linux OS
DIP read
This example shows how to read the states of the DIP switches of the Tiger computer’s front panel. After running the program, the state of every DIP switch will be displayed.
Joystick
This example shows how to get inputs from the joystick located on the front panel of the Tiger computer.
LED
This example shows how to change the colors of the RGB LEDs located on the front panel of the Tiger computer.
OLED
This example shows how to use the OLED screen located on the front panel of the Tiger computer.
TCXV example web-app
Tiger City IMX Industrial Computer with Linux OS
The device hosts a web application that can be accessed by connecting to it via a local network.
Type node /opt/redisage/example-app/server.js in the device's terminal to start hosting an example web application.
Example web application
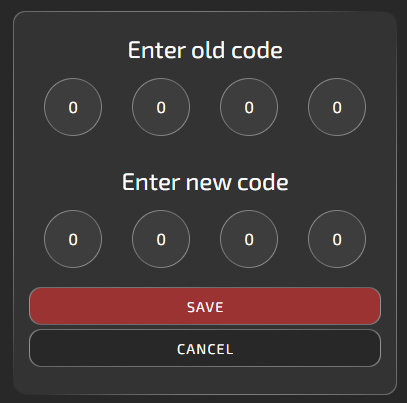
Login
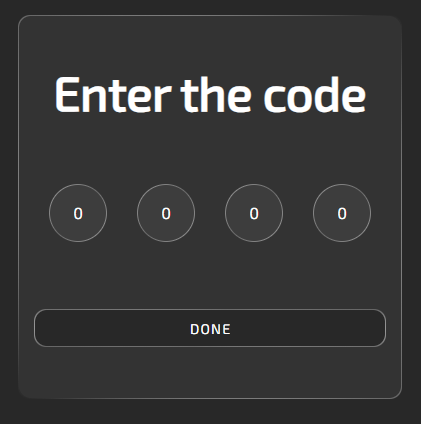
The default code is 0000. After logging in, a user can change it. The code settings are in the upper-right corner of the site, next to the help button.
Panels
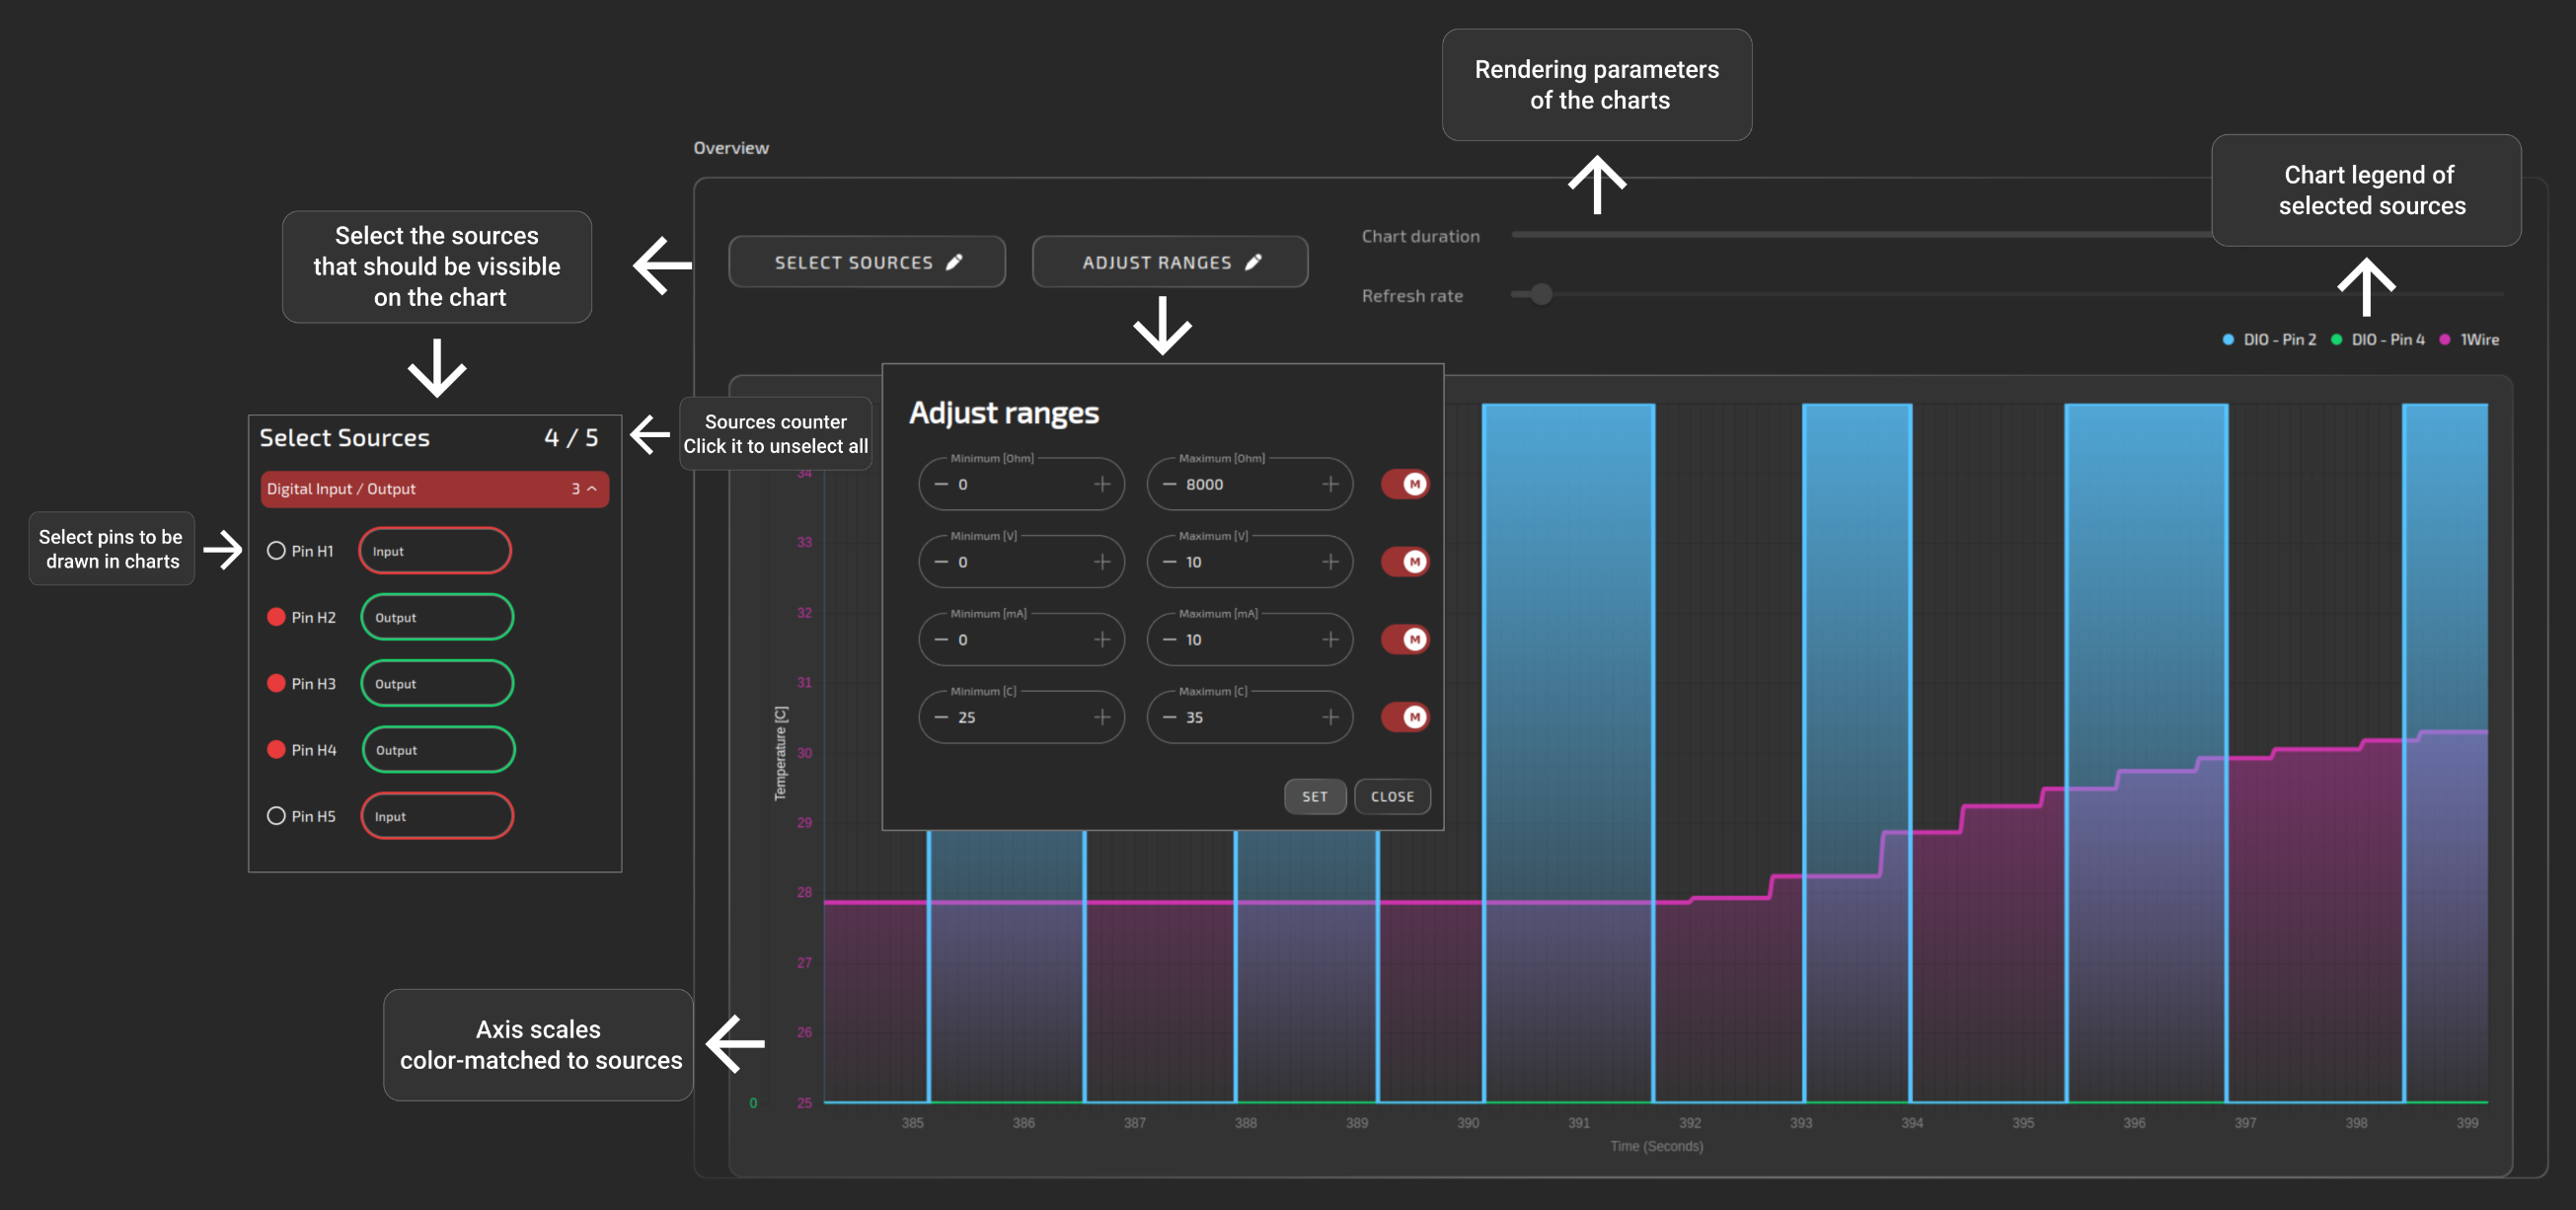
Overview
The purpose of this panel is only to display data from different interfaces on a common chart. Output pins are to be controlled via individual interfaces pages.
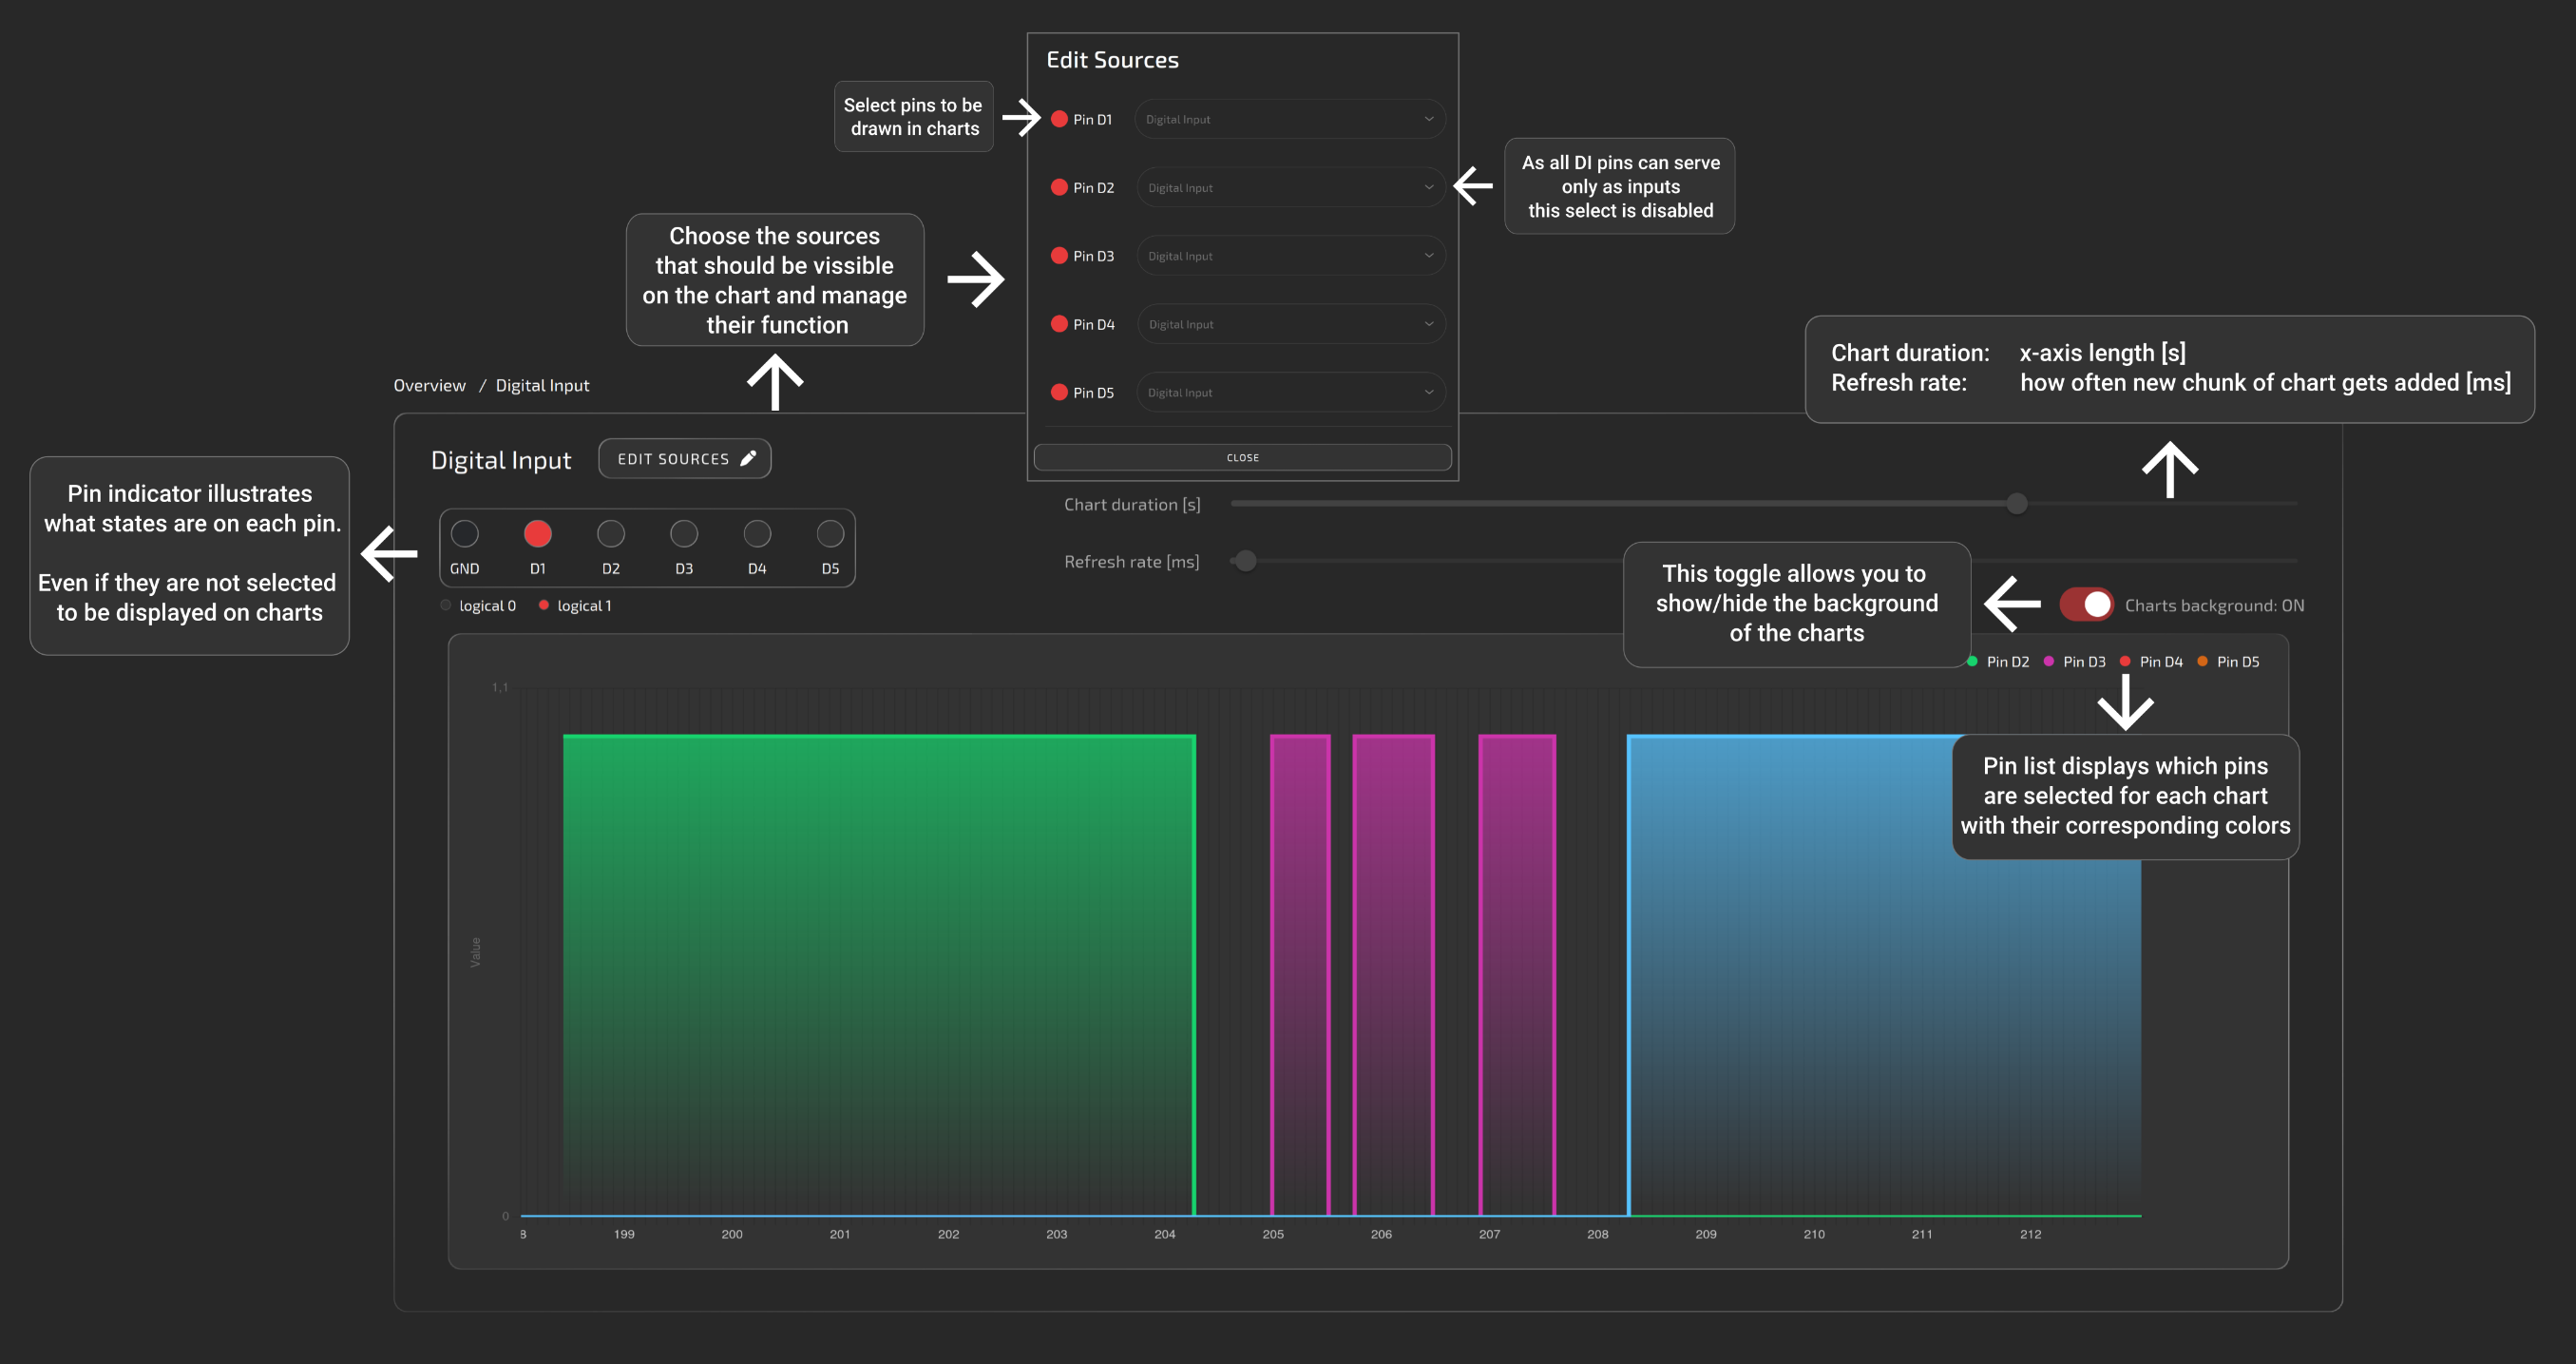
All of the below help images are also available on the site by clicking the question mark in the upper-right corner.
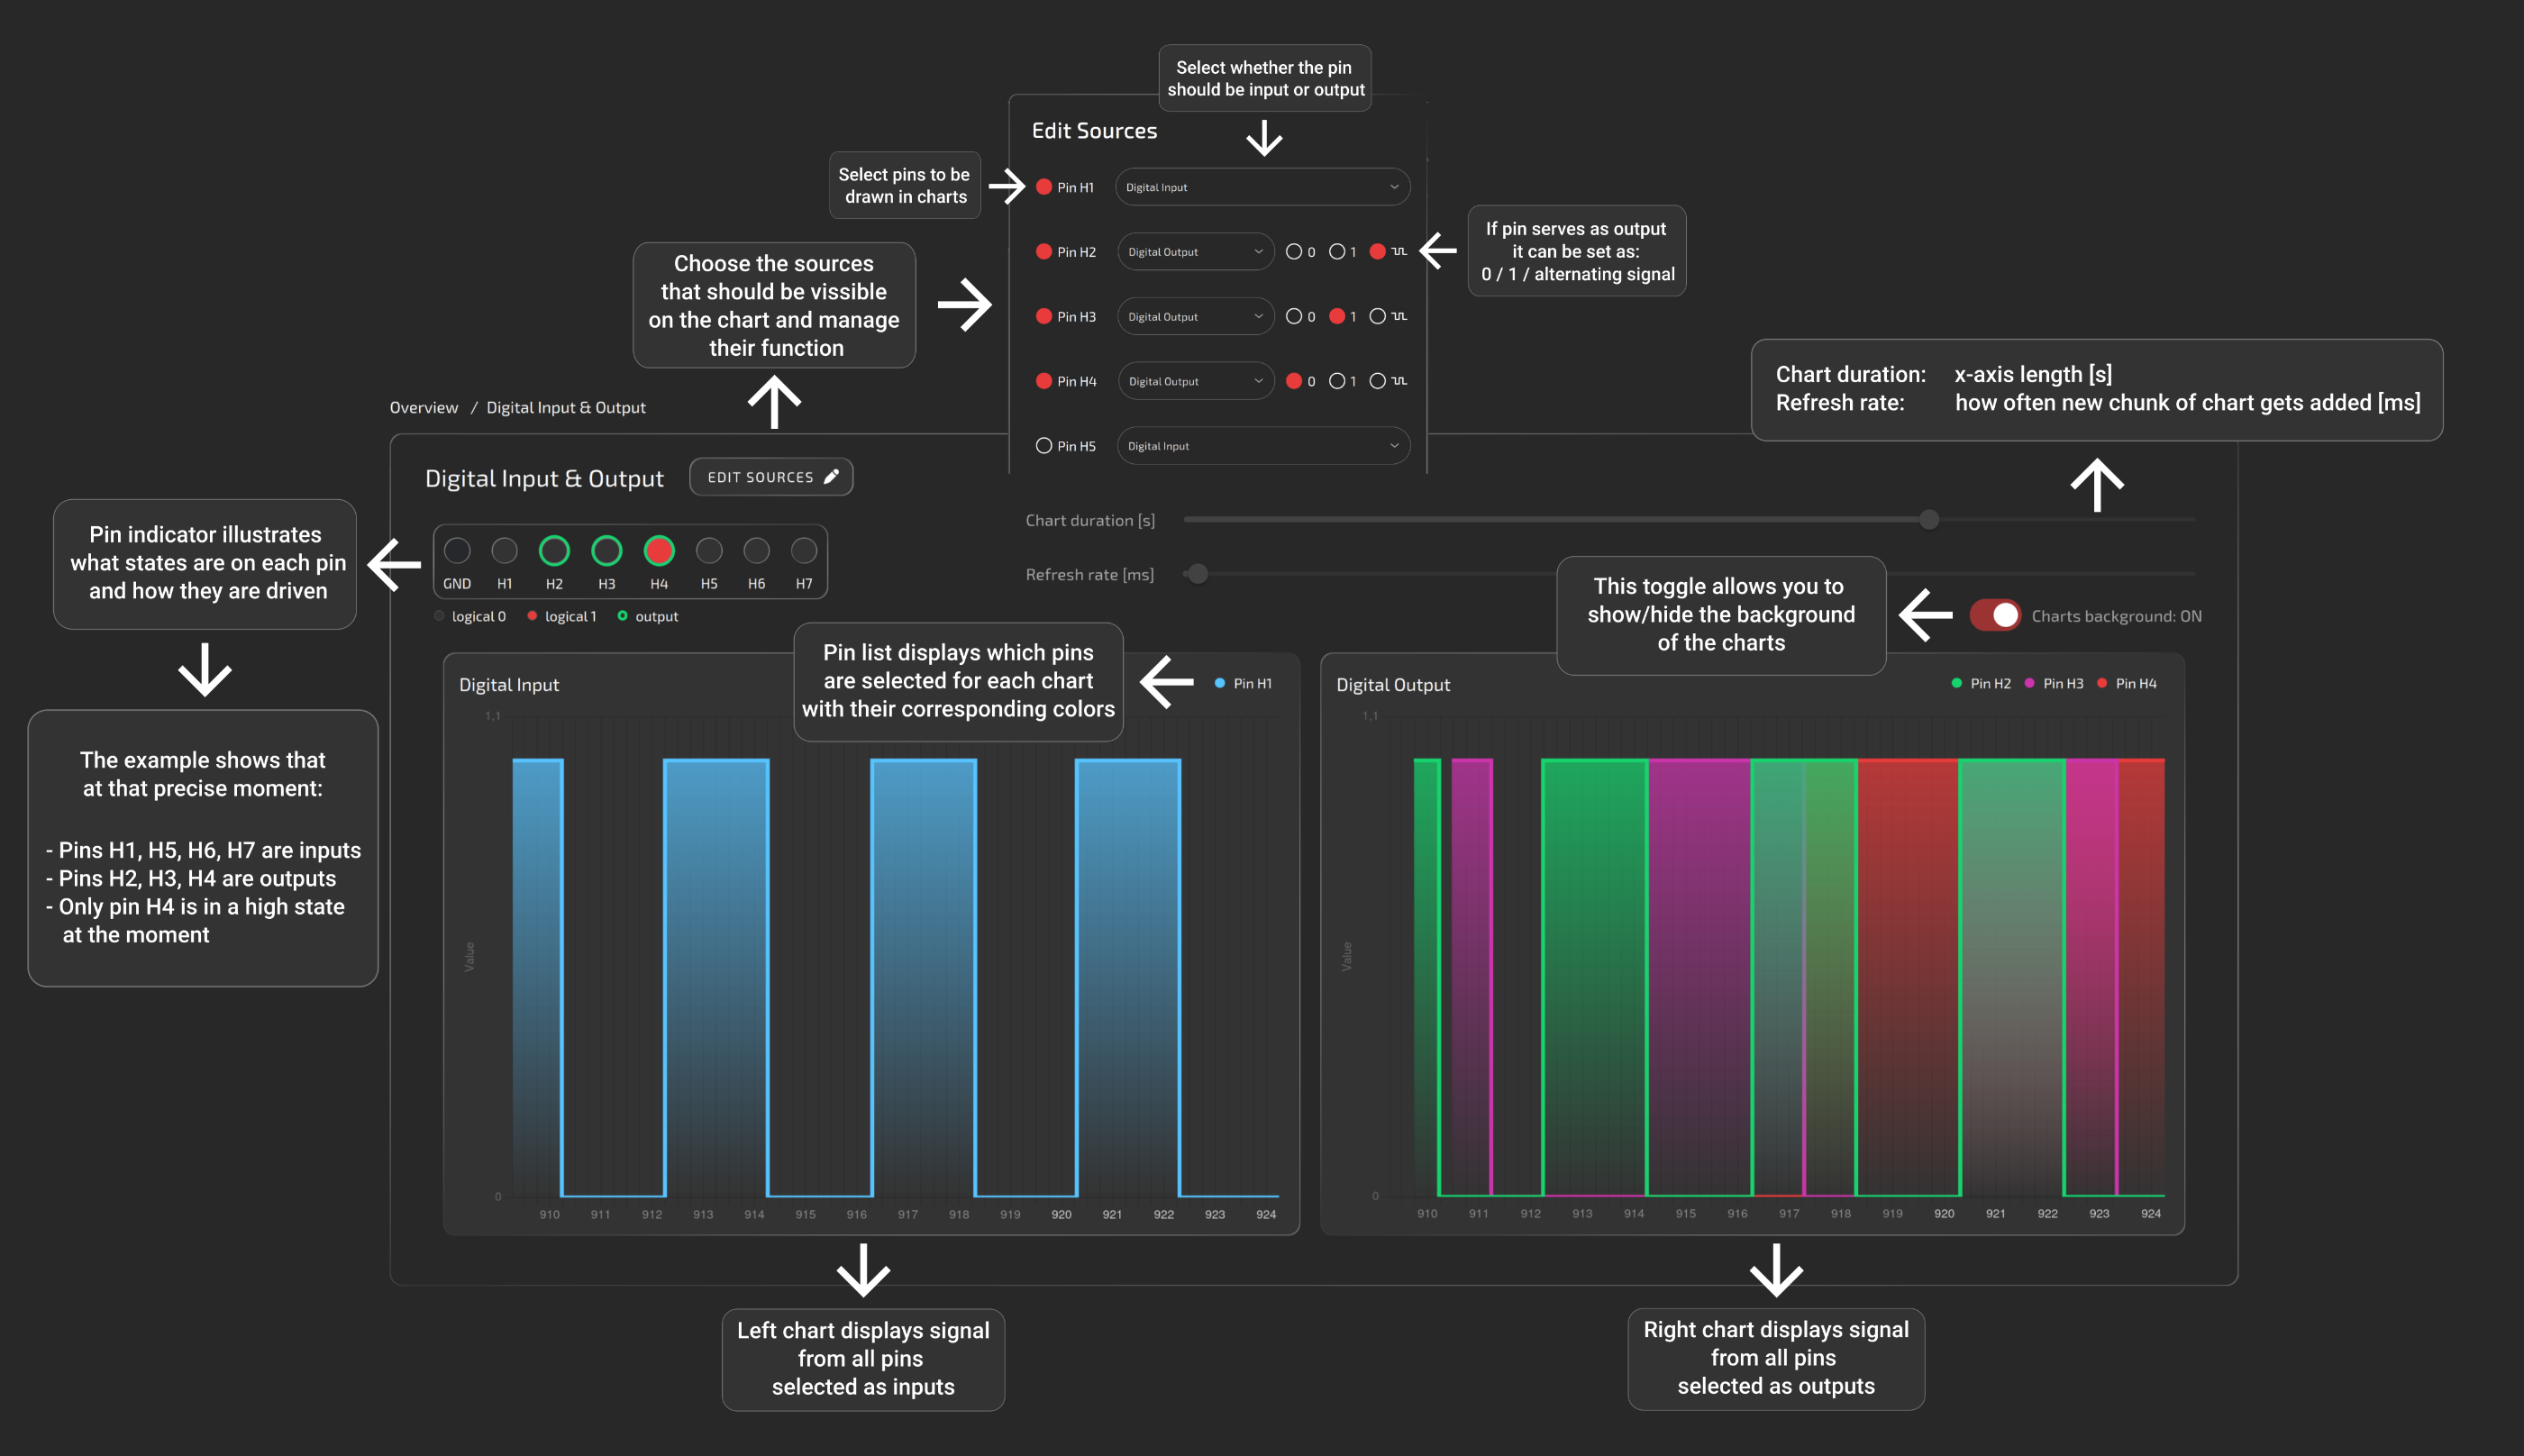
Digital input
Digital input/output
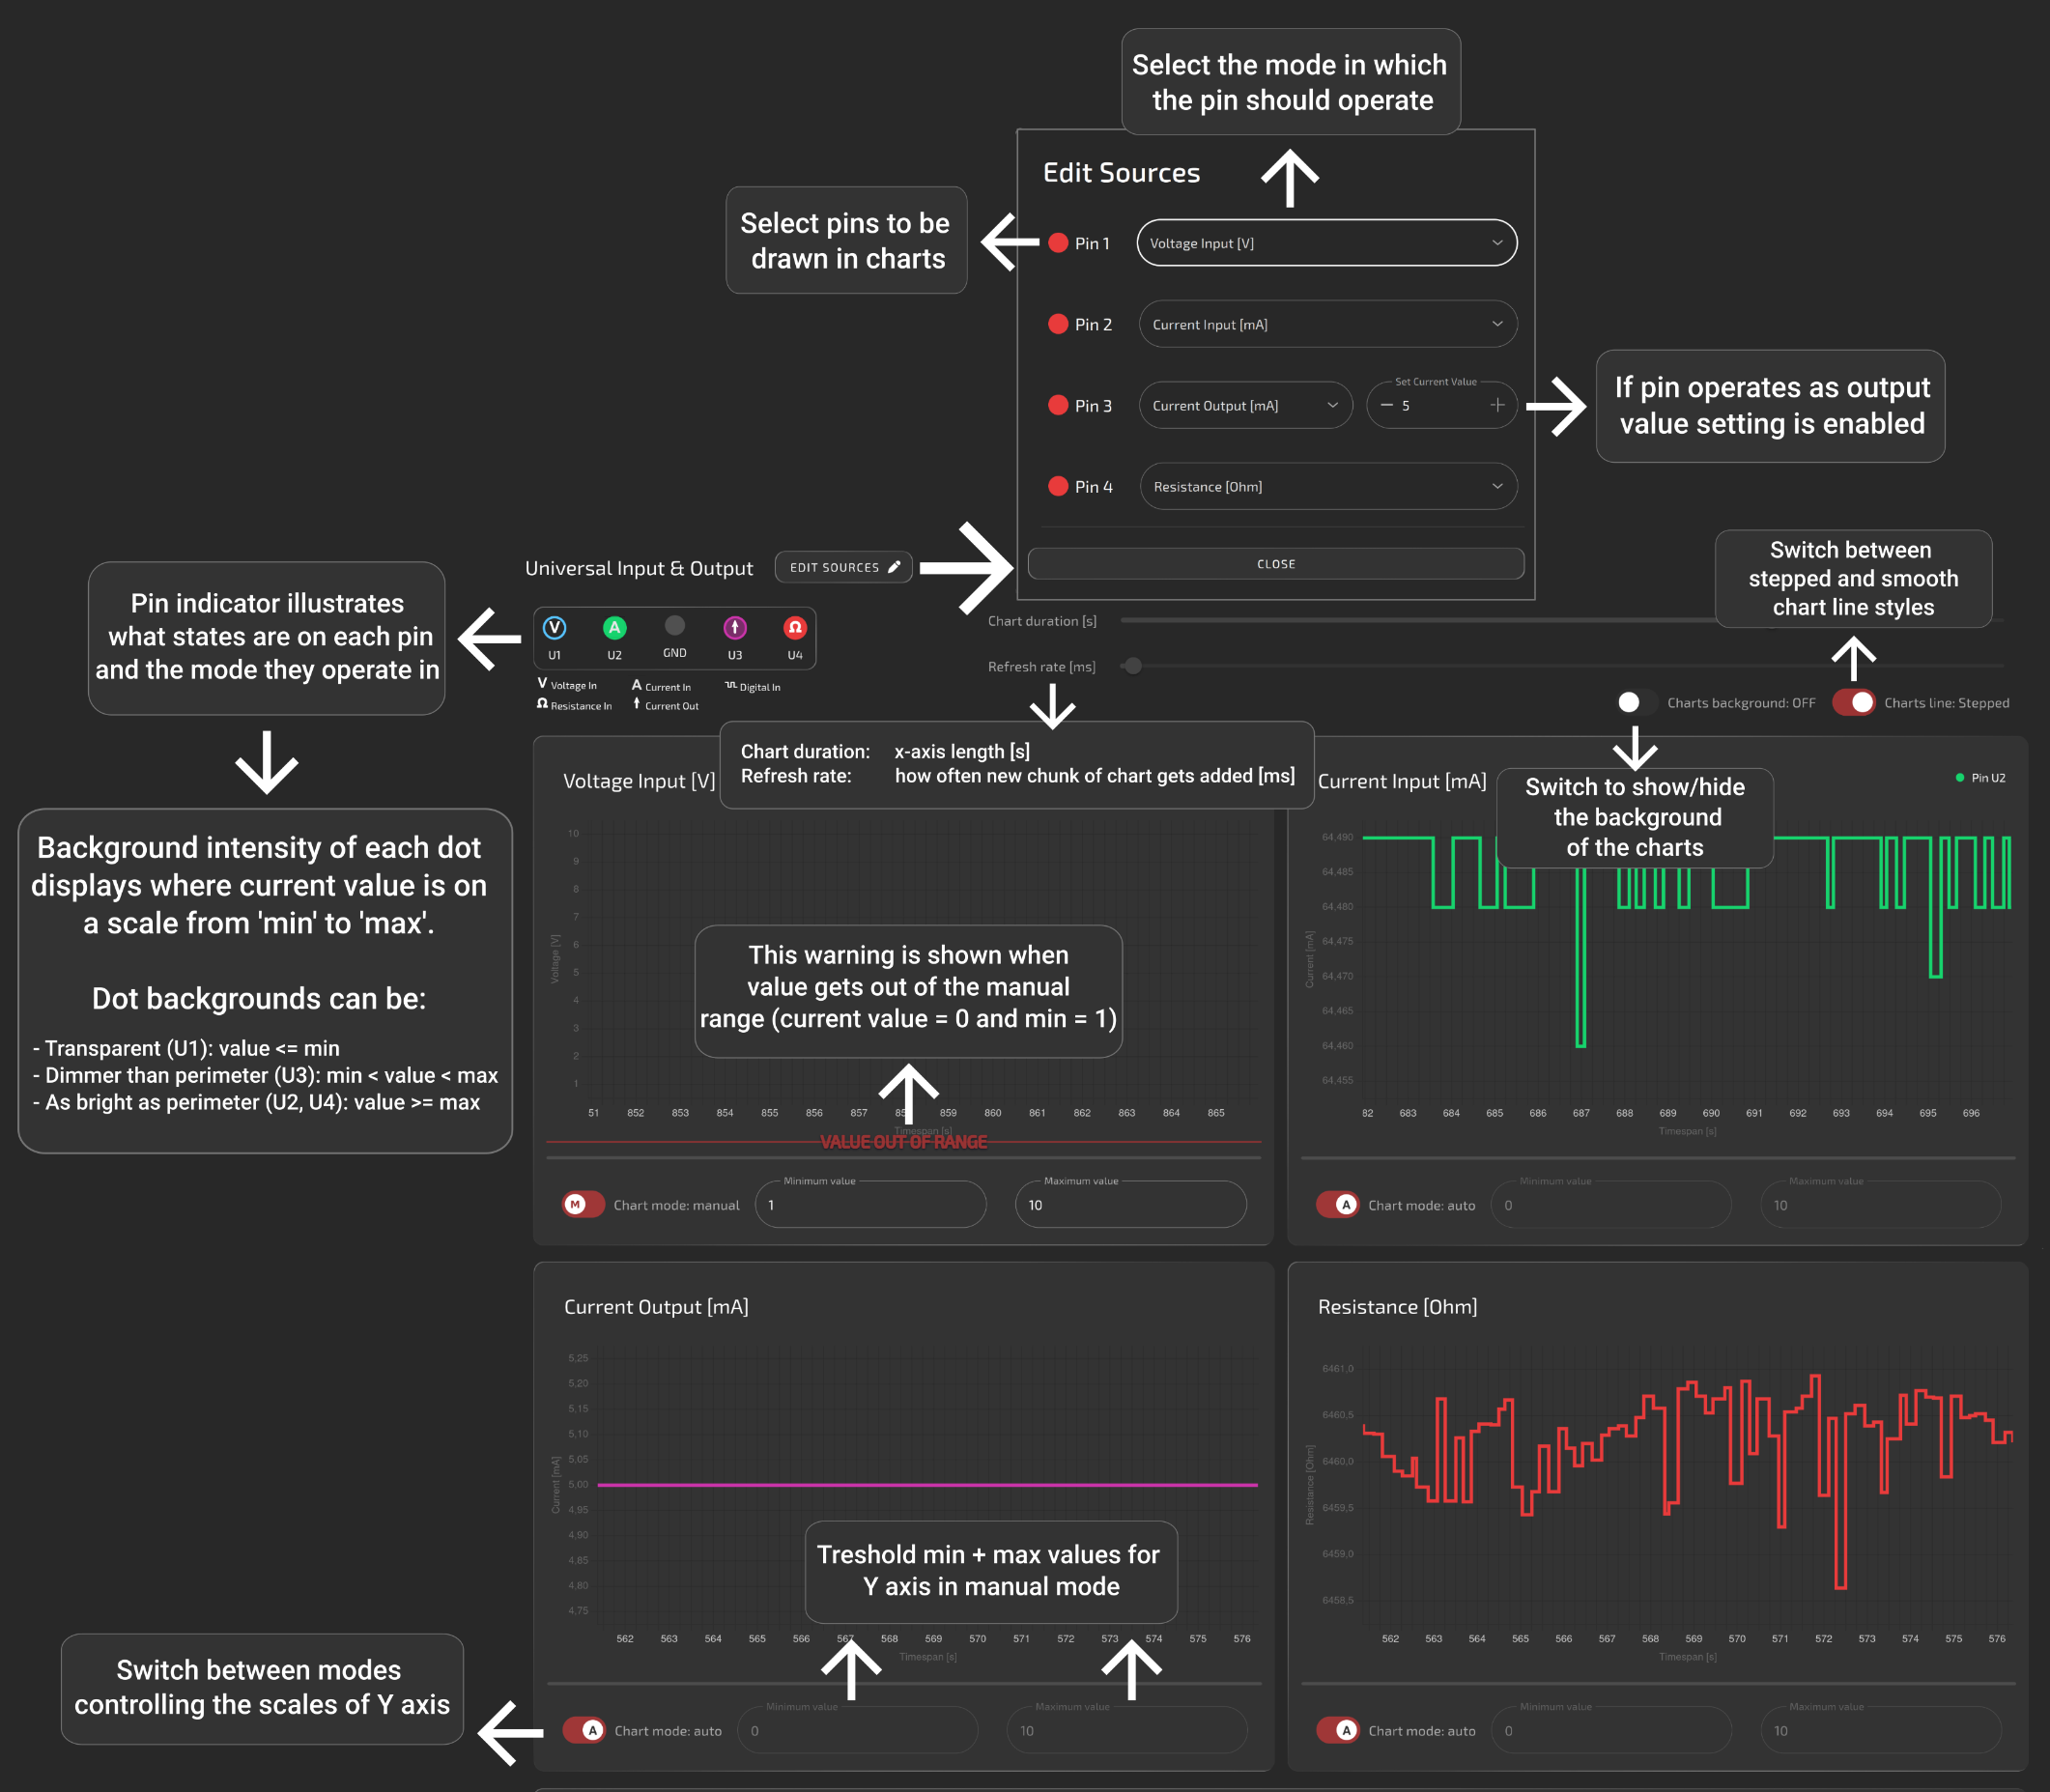
Universal input/output
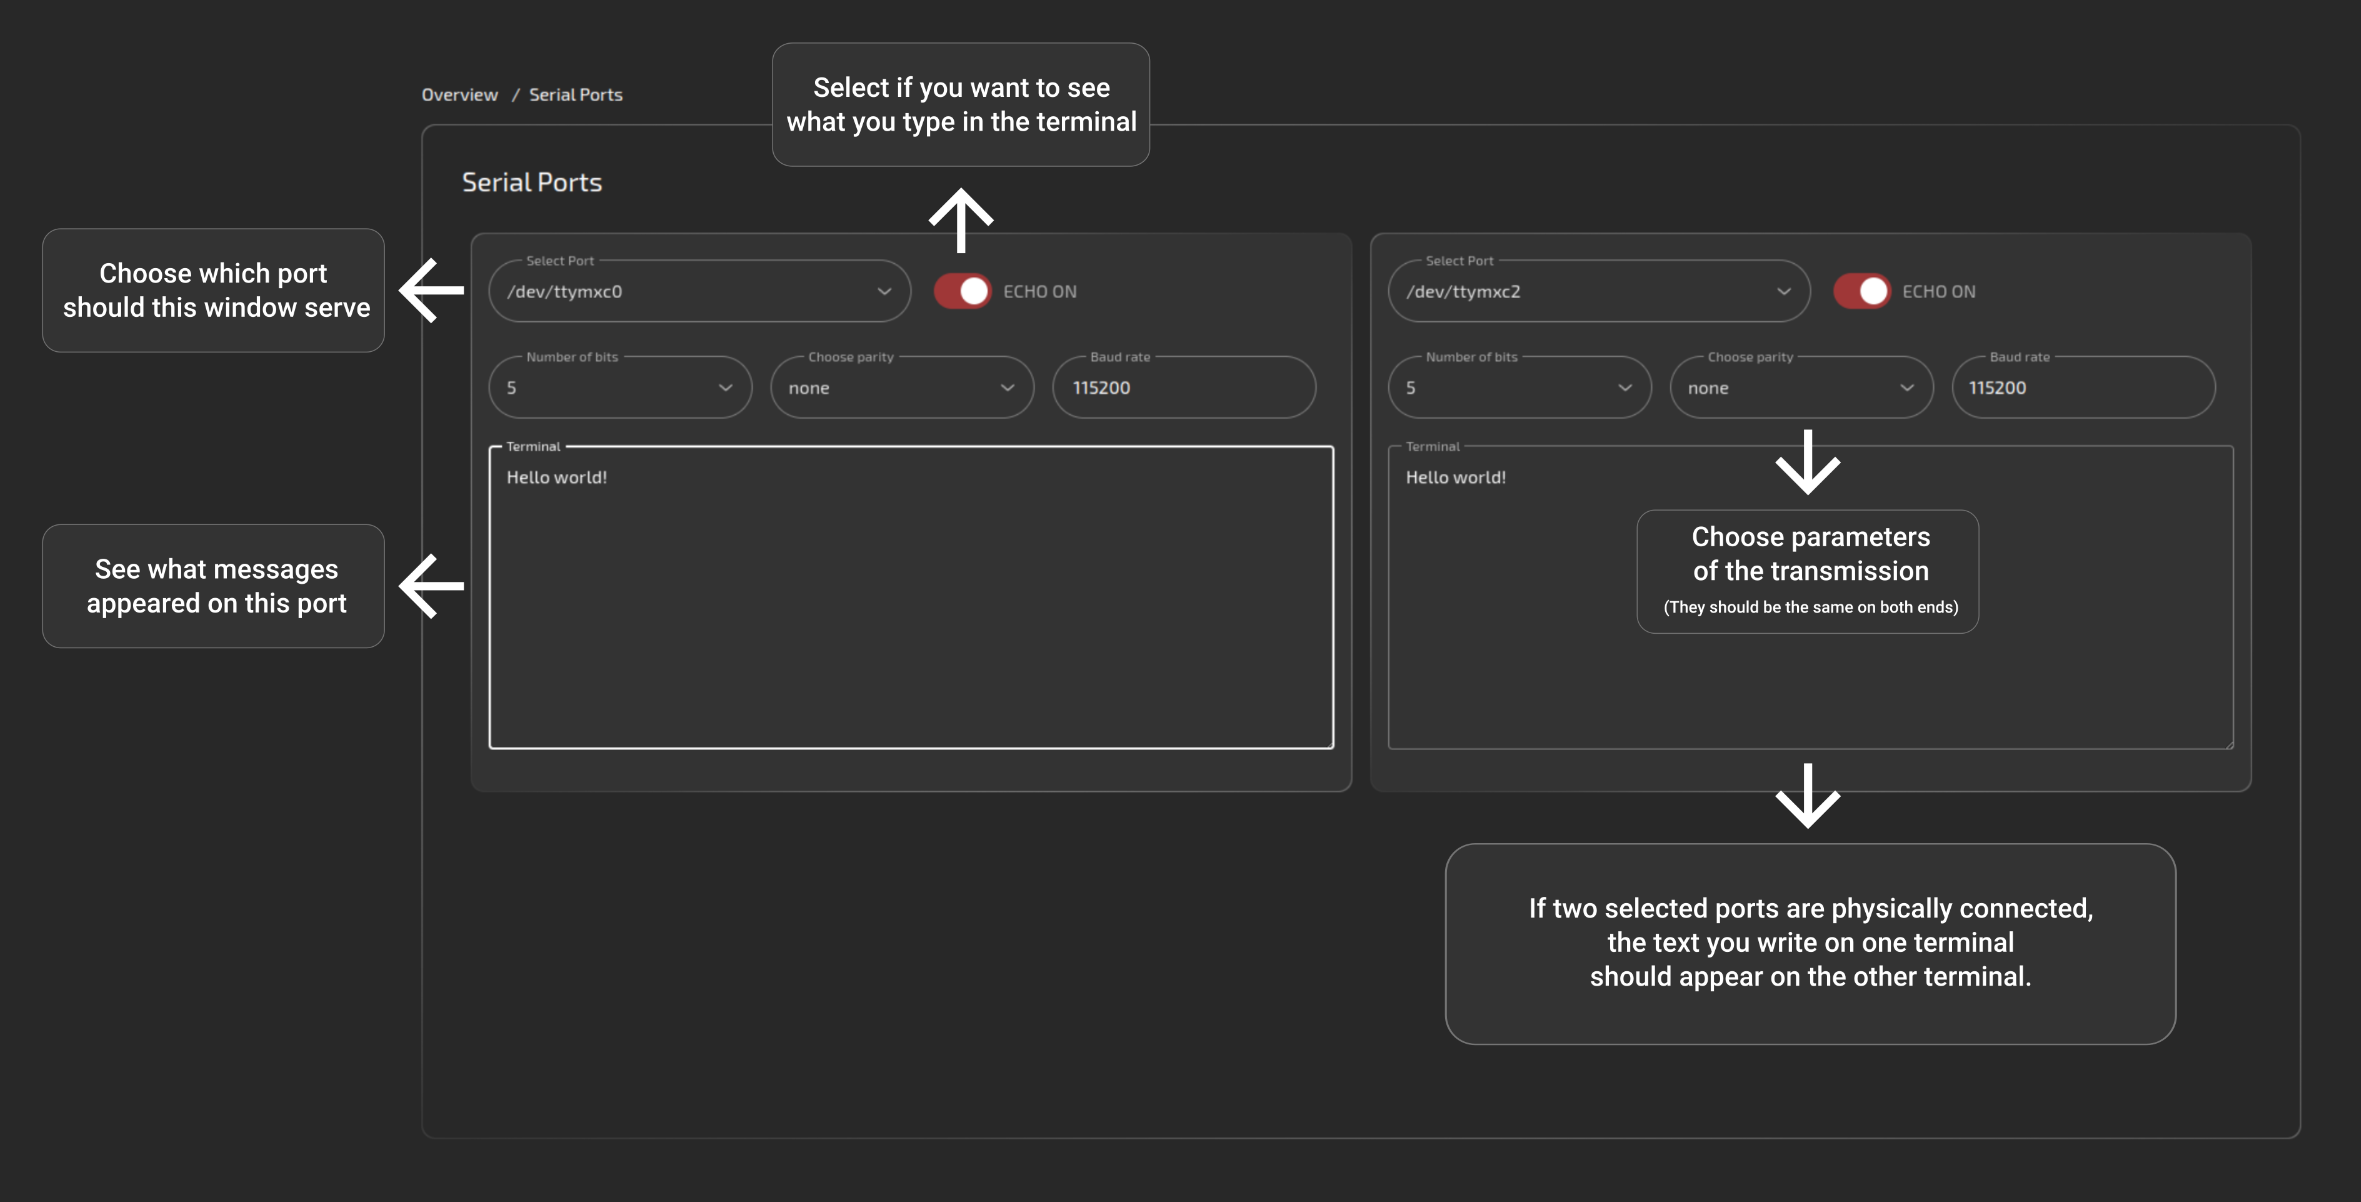
Serial
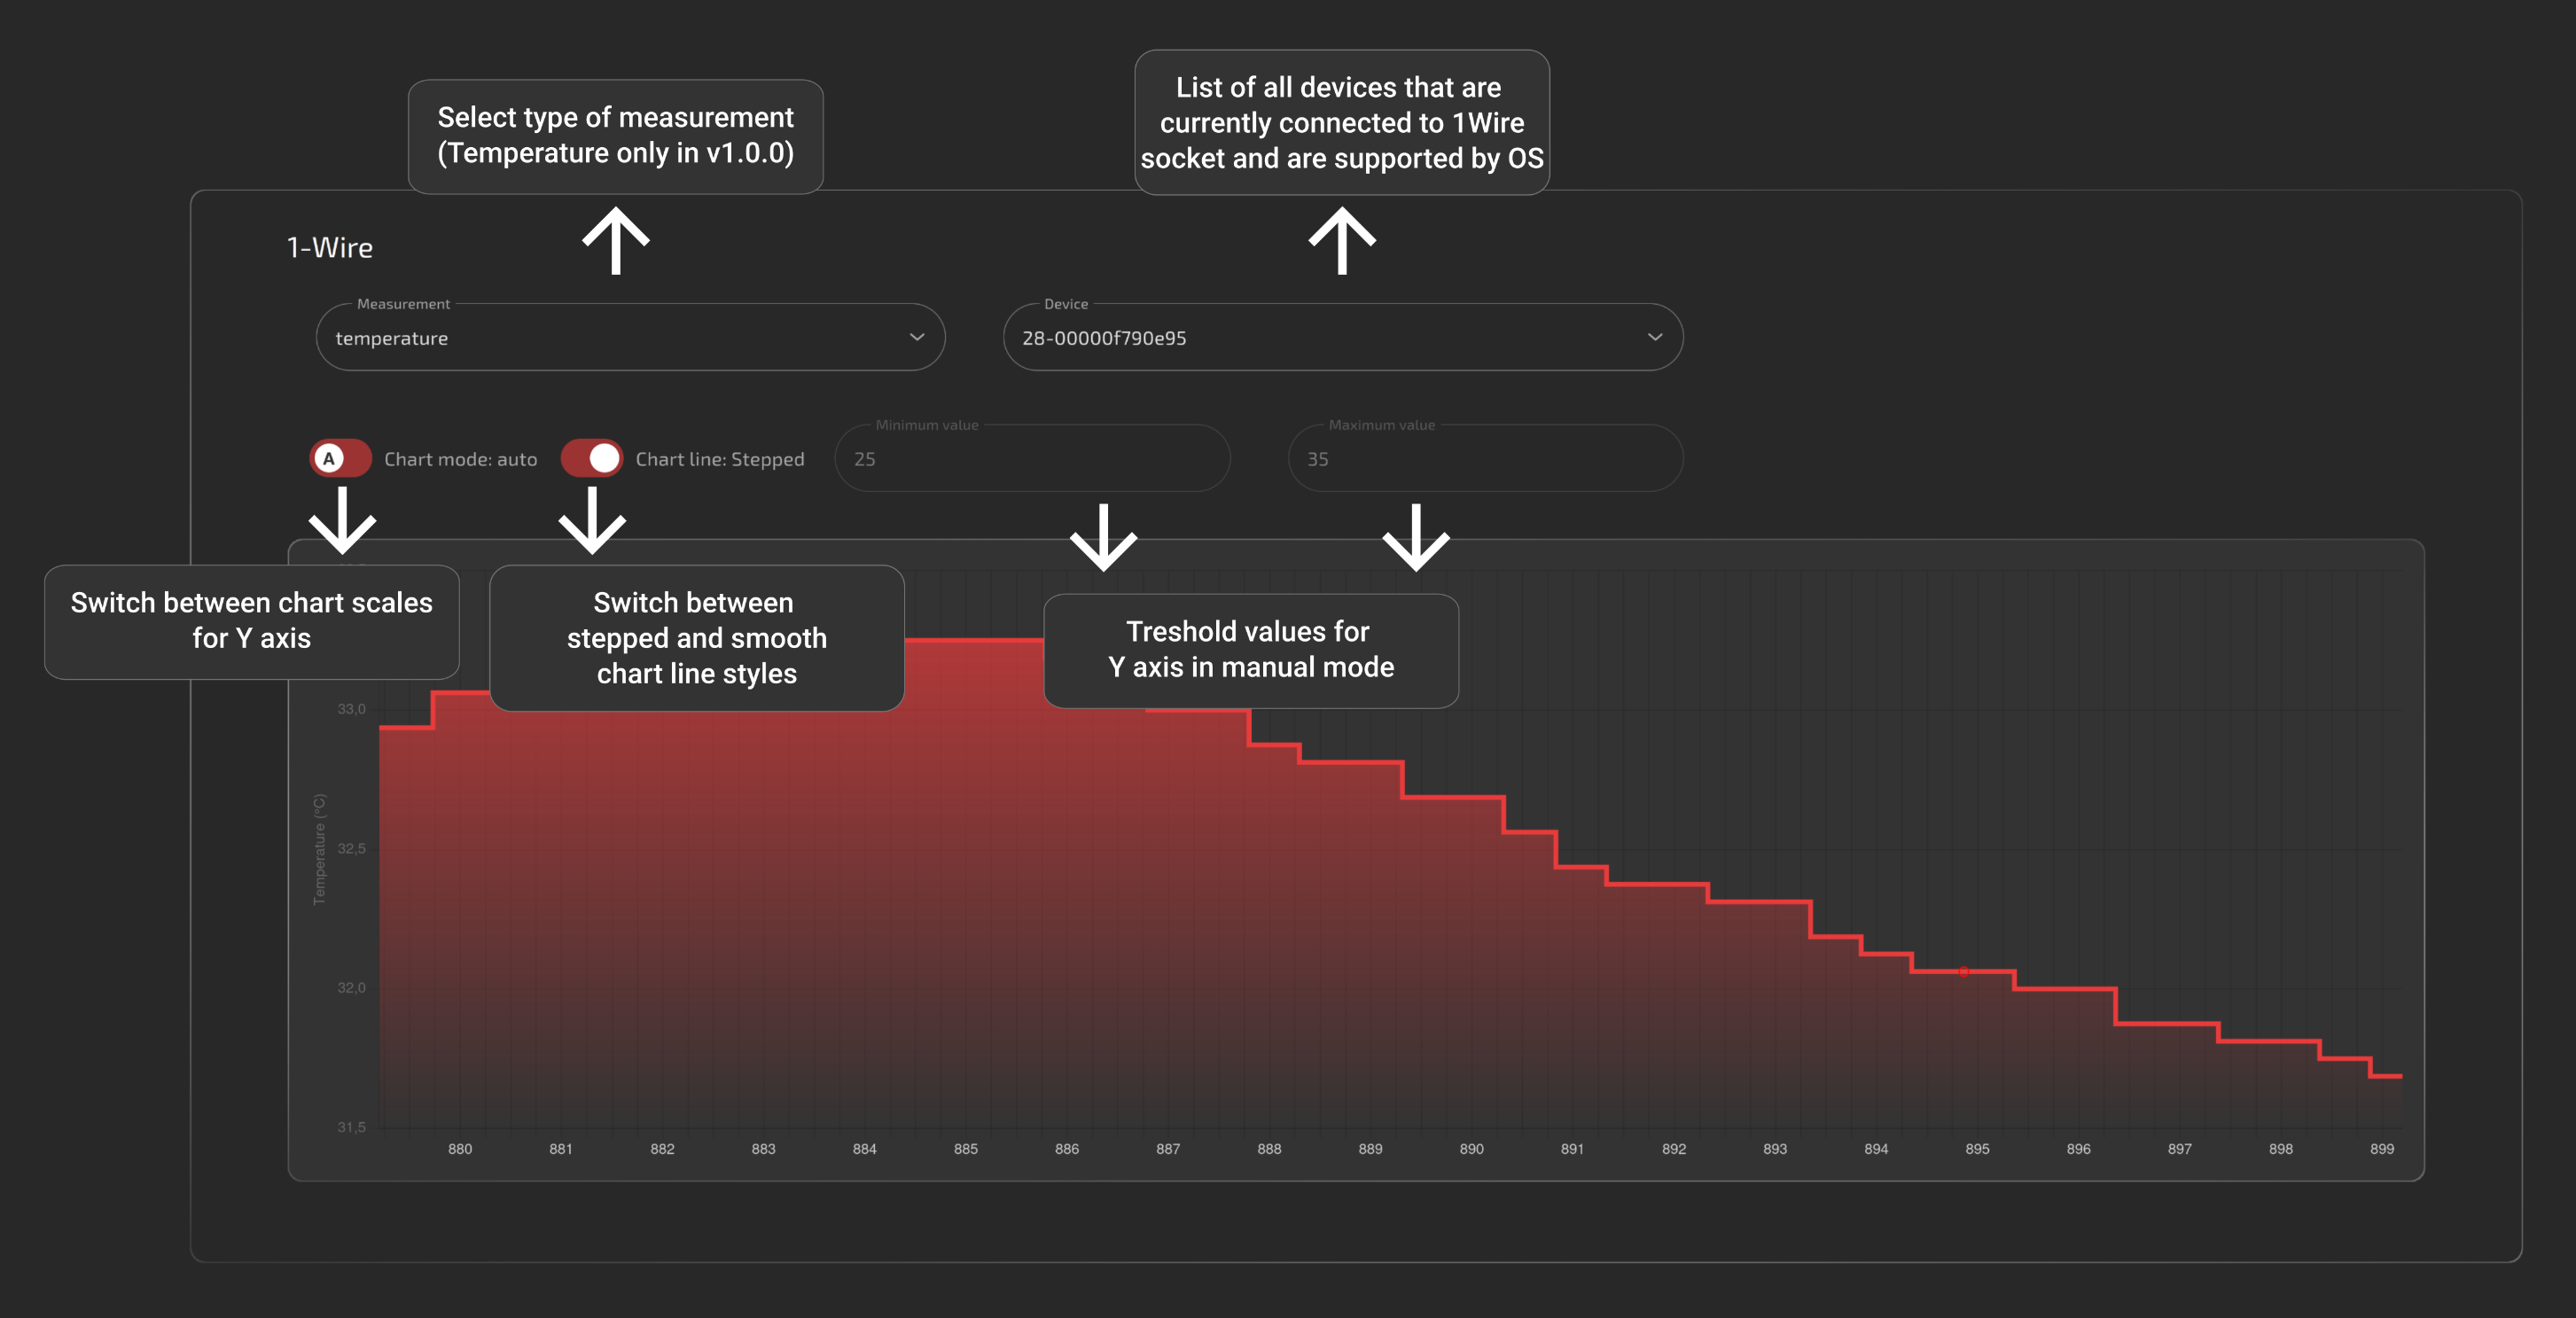
1-Wire
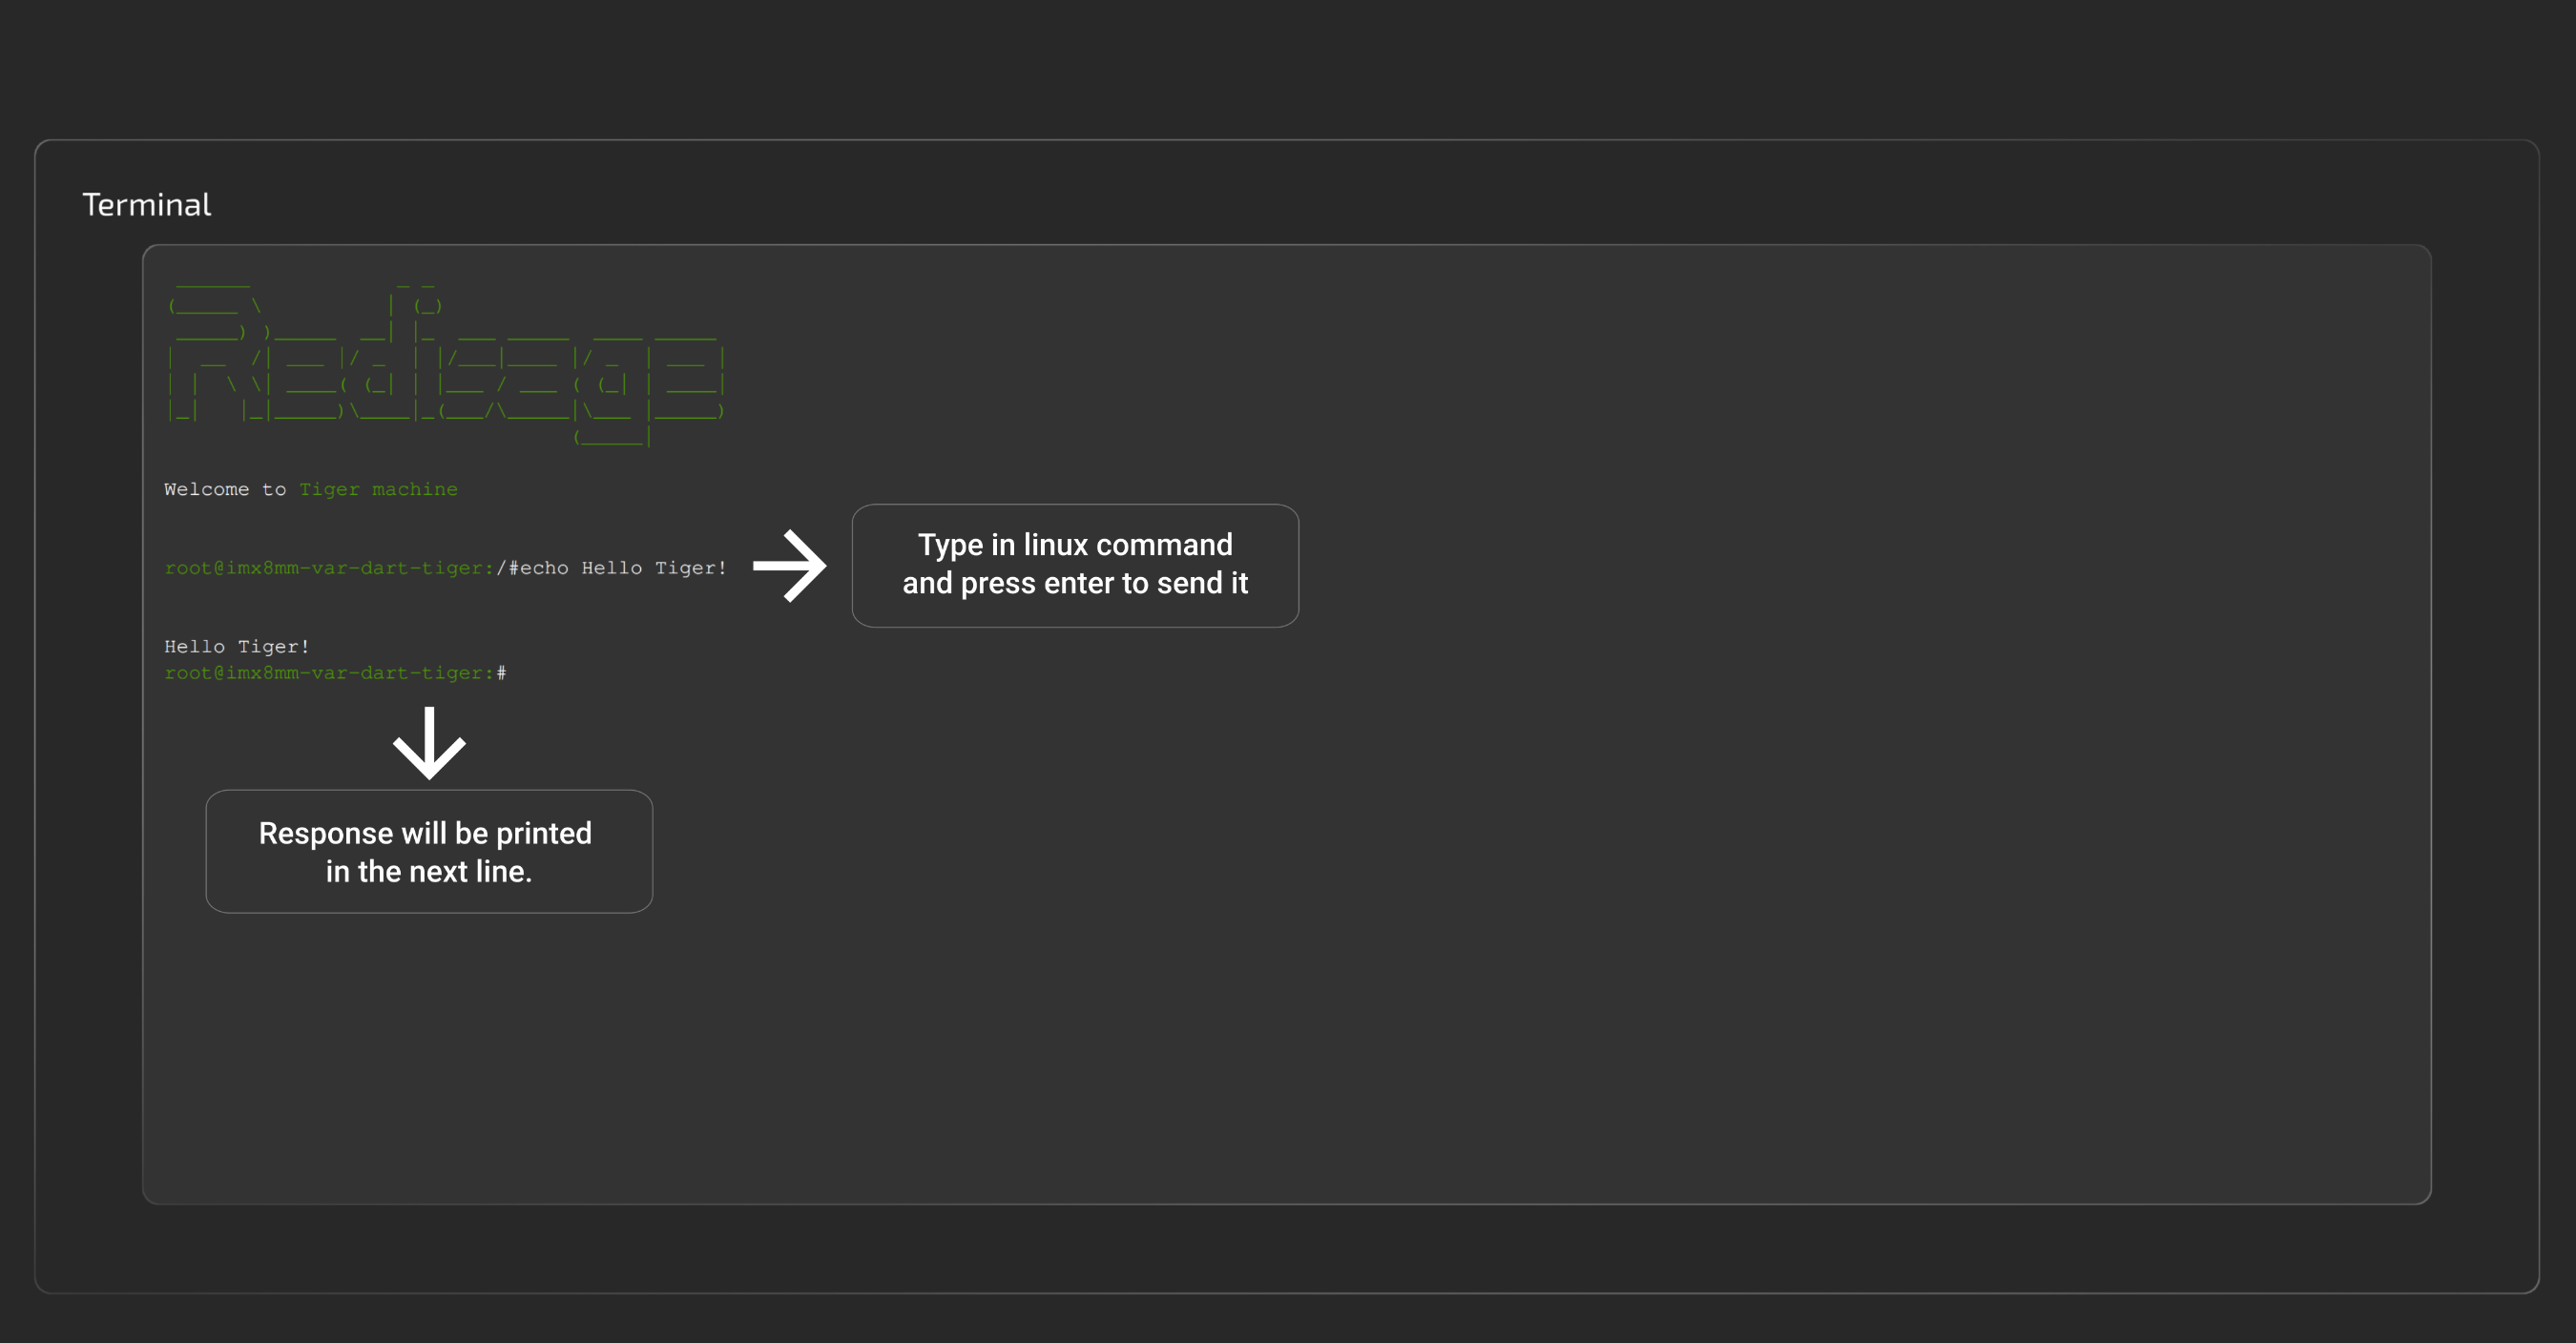
Terminal
This panel serves as a terminal emulator for basic communication with the device. It allows navigating through the directories, looking up logs or connected devices and much more.
GitHub repository: soon.