| **C20 C21 C22 C23 C24 C25** **[](https://doc.redisage.com/uploads/images/gallery/2024-03/8687e11c-6546-4888-bb0e-5ec48c9a7daf.jpg)** | **Features** - Ethernet converter to RS232/RS485 - ESD protection for the RS485 data line - Power supply: +12 to +30 VDC - Transmission speed up to 115200 bps - Tx, Rx and power LED indicators - RS485 embedded termination 120 ohm - Operating temperatures: -40°C to +75°C - DIN rail mounting - Dimensions: 90x56.4x22.5 mm - 3 years warranty - Customization of OEM is welcomed |
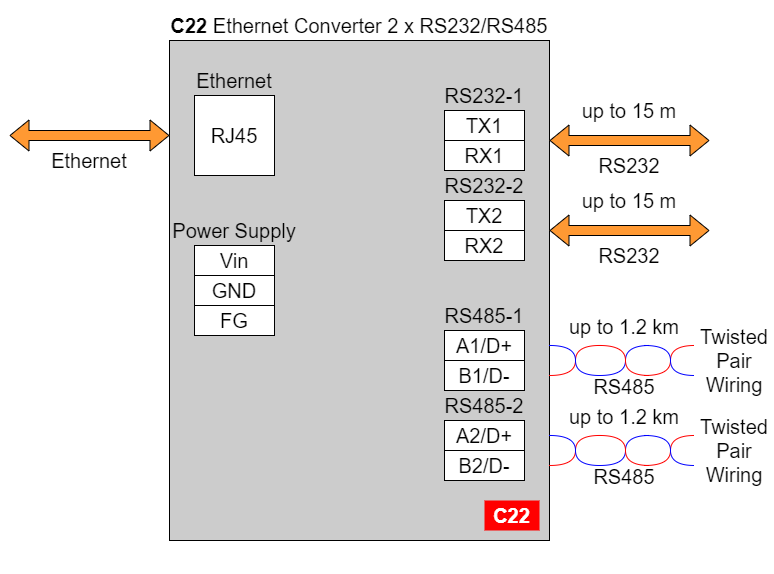
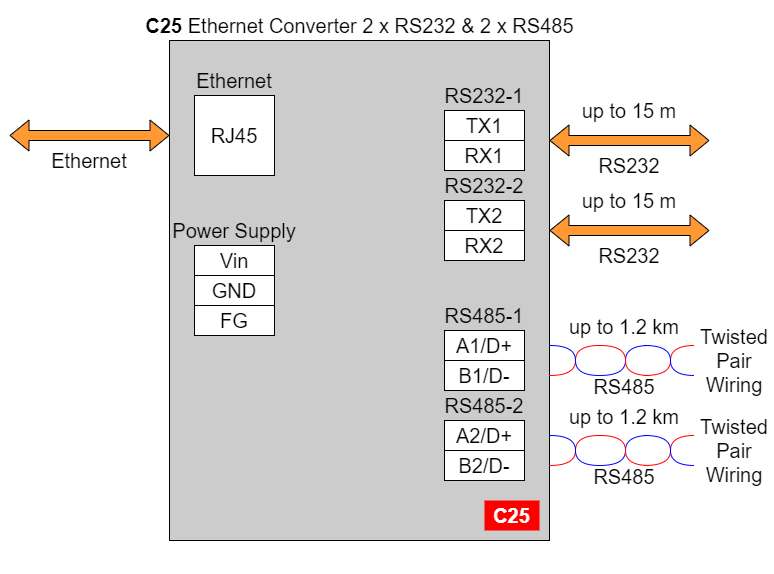
In the C22 converter user should use only RS232 or only RS485 interface of one port as they occupy the same internal bus of the device.
#### C23 - Ethernet Converter 4 x RS232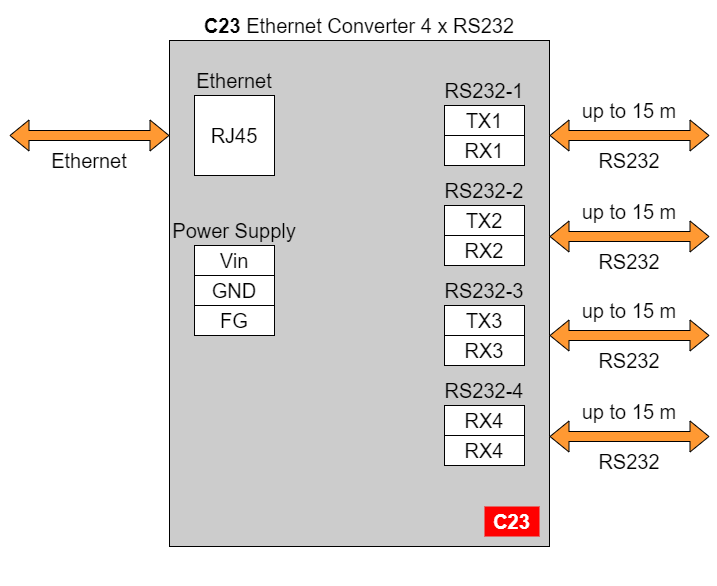
Changing port’s service closes all sockets connected to the ports.
In the UDP mode, port number 15051 is reserved for UDP broadcast service.
Network settings can be changed on the “Network” page. [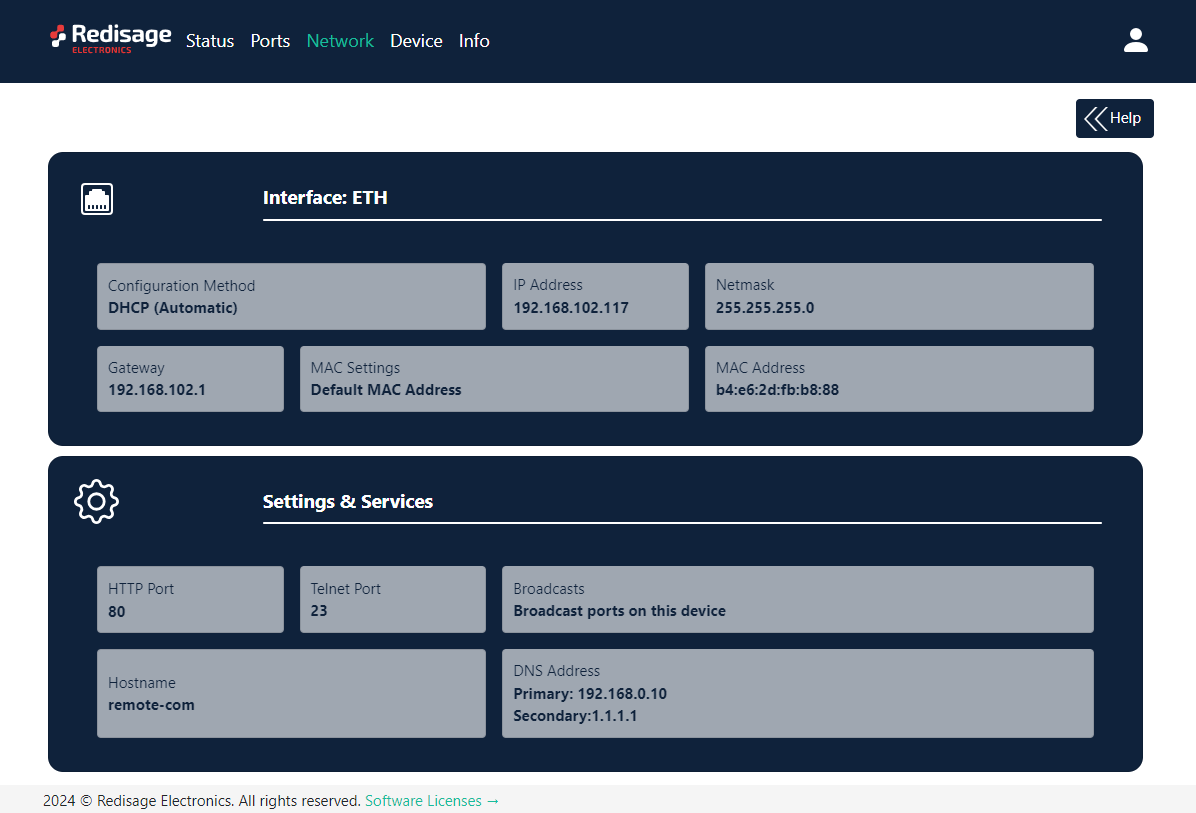](https://doc.redisage.com/uploads/images/gallery/2024-03/8386aa9b-6add-432d-945d-303e590ed269.png) [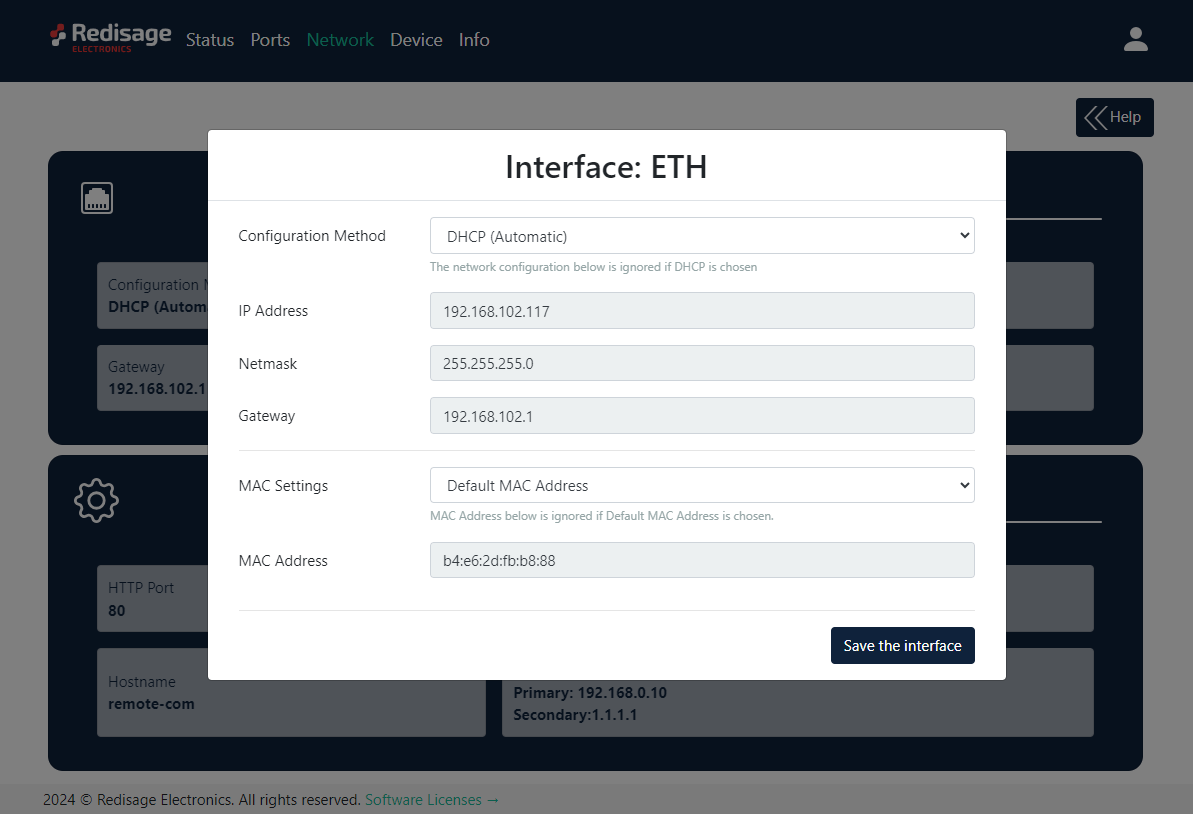](https://doc.redisage.com/uploads/images/gallery/2024-03/98a9fcdf-9549-4d9a-9e04-ef90021cfaff.png) {{@170#bkmrk-item-description-con}} [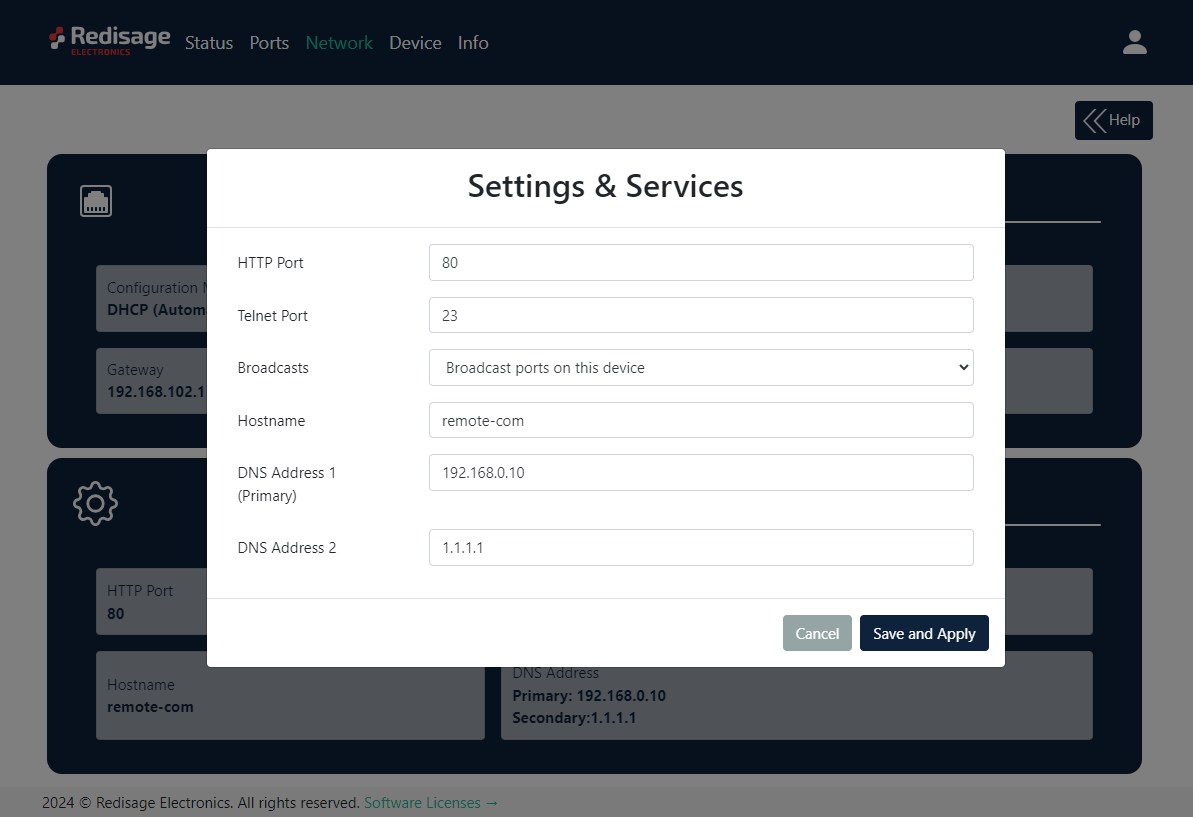](https://doc.redisage.com/uploads/images/gallery/2024-03/e3574681-36ef-4fdb-8979-97046c2c7d5d.png) {{@170#bkmrk-item-description-htt}} On the “Device” page, there are tools used to a firmware update, a factory reset and a device reboot. [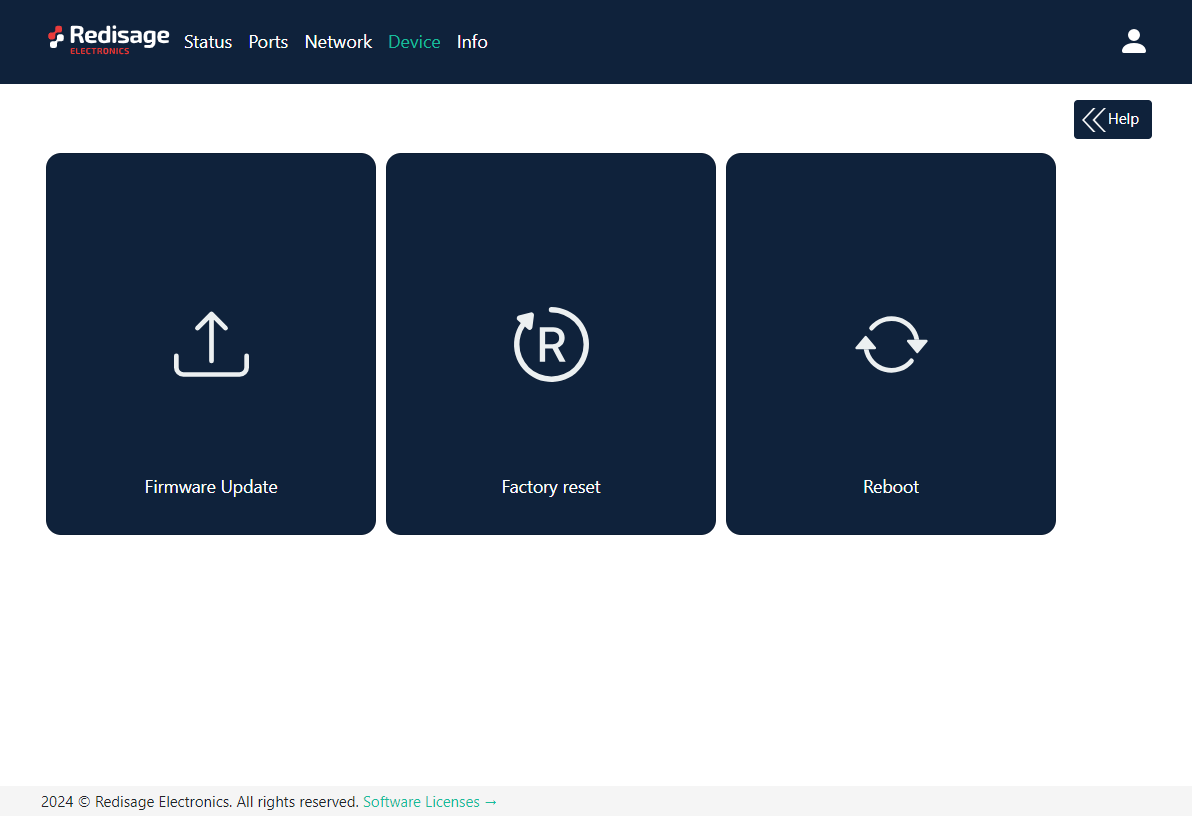](https://doc.redisage.com/uploads/images/gallery/2024-03/744e0c74-d7cf-43f3-a024-fa06e1bd9fc2.png) On the “Info” page, there is information about firmware, model, serial number and frontend version. [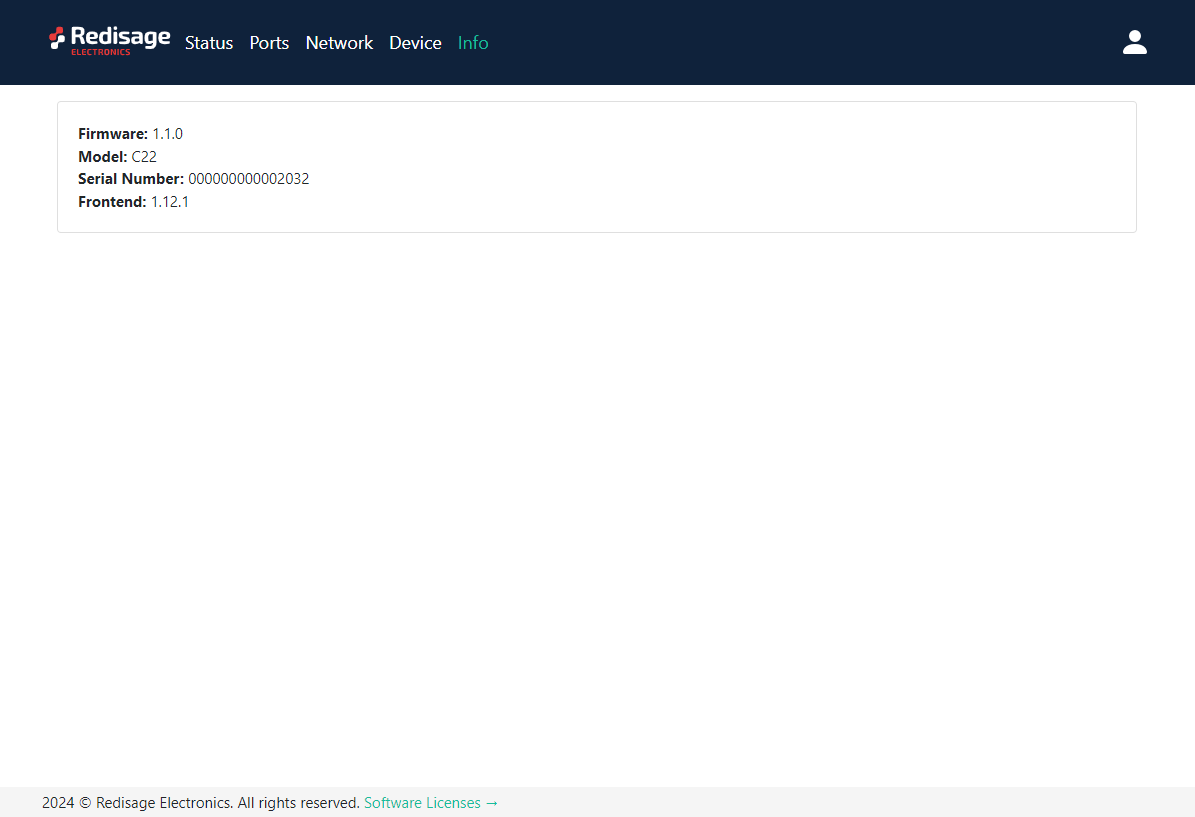](https://doc.redisage.com/uploads/images/gallery/2024-03/1a9460c1-8535-4837-9f71-c1b91c86eece.png) #### Configuration by the Serial Console The device can be reconfigured via a serial console. C20 - C22 require a dedicated USB/UART converter connected to the USB micro-B connector on the front of the device. C23 - C25 can be directly connected to a PC through a USB cable. ##### {{@173#bkmrk-procedure-to-enter-s}} {{@173#bkmrk-turn-off-the-power-o}} ##### {{@173#bkmrk-procedure-to-enter-s-1}} {{@173#bkmrk-install-stm32-virtua}} Once this is done, log in using the default username and password, then change the network settings using "ipconfig" command. [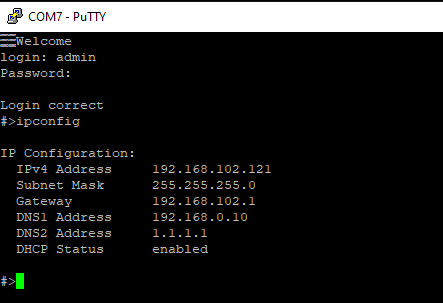](https://doc.redisage.com/uploads/images/gallery/2024-03/9ec0da3e-1e6e-459b-8c0e-388422e65cb3.png) ##### {{@170#bkmrk-list-of-all-commands}} {{@170#bkmrk-command-description-}} {{@171}} #### Configuration by the Telnet Console Access to the Telnet console can be obtained using a serial terminal program. Configure the connection type to Telnet, enter the IP address and Telnet port number (**23** by default). Telnet console commands are the same as ones described in the serial console section. [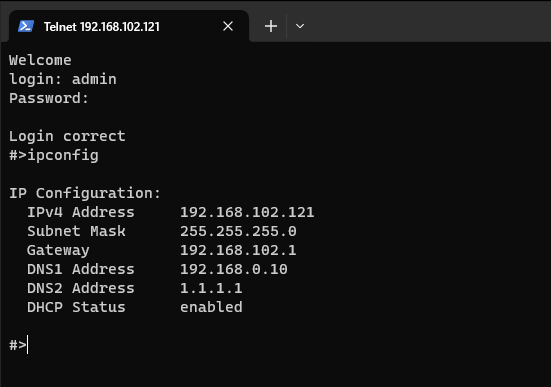](https://doc.redisage.com/uploads/images/gallery/2024-03/f99a2f2b-4bbf-4551-bb89-3a6eb00fd766.png) #### Redisage Configurator To configure the RemoteCOM ports, use the Redisage Configurator program. Redisage Configurator is an app used to emulate a connection between the converter and a PC as if it would be connected directly to the COM port. ##### {{@173#bkmrk-configuration-proced-1}} {{@173#bkmrk-change-the-device-po}} [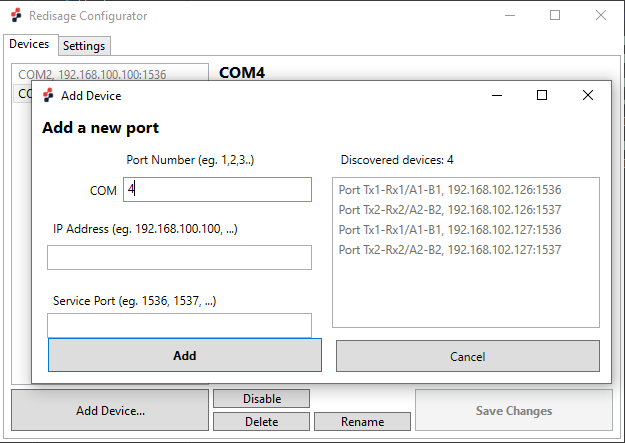](https://doc.redisage.com/uploads/images/gallery/2024-03/5e5210ff-821e-48c9-ab69-bb723fca635e.png)If any change is made to the port configuration, make sure to apply it with the “Save Changes” button.
#### Reset to factory defaults Reset to factory defaults is possible on the web page in the device section or using the service mode. #### Service mode ##### {{@173#bkmrk-procedure-to-enter-s-2}} {{@173#bkmrk-turn-off-the-power-o-1}} ##### {{@173#bkmrk-procedure-to-enter-s-3}} {{@173#bkmrk-install-stm32-virtua-1}} ##### {{@170#bkmrk-list-of-commands-in-}} {{@170#bkmrk-command-description--1}}{{@170#bkmrk-in-the-service-mode%2C}}
{{@168}} SR-D