The configuration is available only if devices are connected to the same Local Area Network as the computer used for it.
### Status page After a successful login, there should be an insight to a list of available connections. If there is more than one connection, it is possible to sort them by ID, timestamp or status. [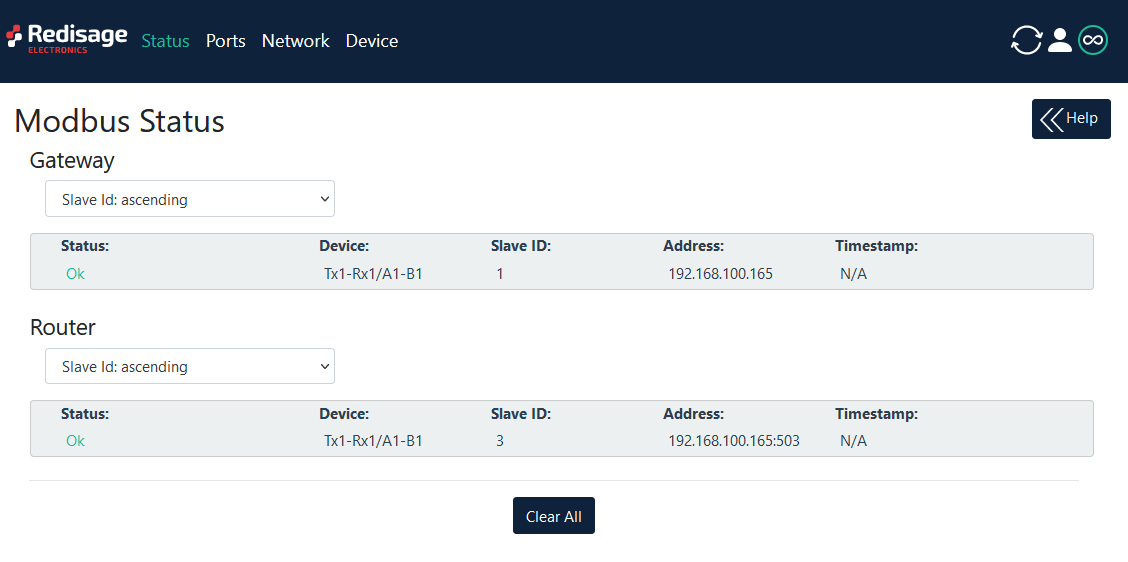](https://doc.redisage.com/uploads/images/gallery/2024-03/4f6ed827-ab6f-4372-8bef-95d723d573c8.png) #### Changing username or password After clicking “Edit User” under the user icon, it is possible to change the username or the password. [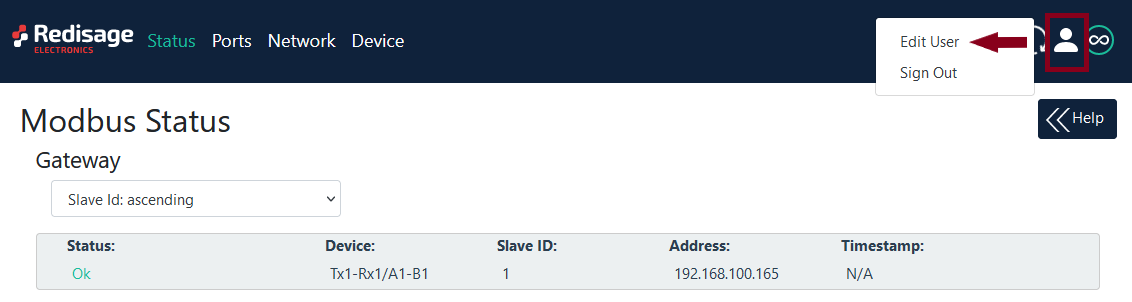](https://doc.redisage.com/uploads/images/gallery/2024-03/d0367566-ce19-4dd7-82c9-75ed8a5fb462.png) [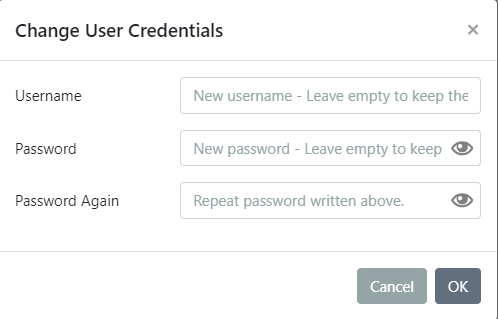](https://doc.redisage.com/uploads/images/gallery/2024-03/08cea4a8-e1e1-4241-a0ea-bf987363d2b7.png)If login details were forgotten, it would be necessary to do a factory reset via a USB/UART converter and a serial console.
### Ports configuration [](https://doc.redisage.com/uploads/images/gallery/2025-09/0Hkimage.png) [](https://doc.redisage.com/uploads/images/gallery/2025-09/gCUimage.png) [](https://doc.redisage.com/uploads/images/gallery/2025-09/vabimage.png) {{@175#bkmrk-item-description-int}}Make sure to save all the changes with “Save and Apply” button located on the bottom of the page.
In the UDP mode, port number 15051 is reserved for UDP broadcast service.
### Network settings In this section, network settings can be changed according to target LAN parameters. [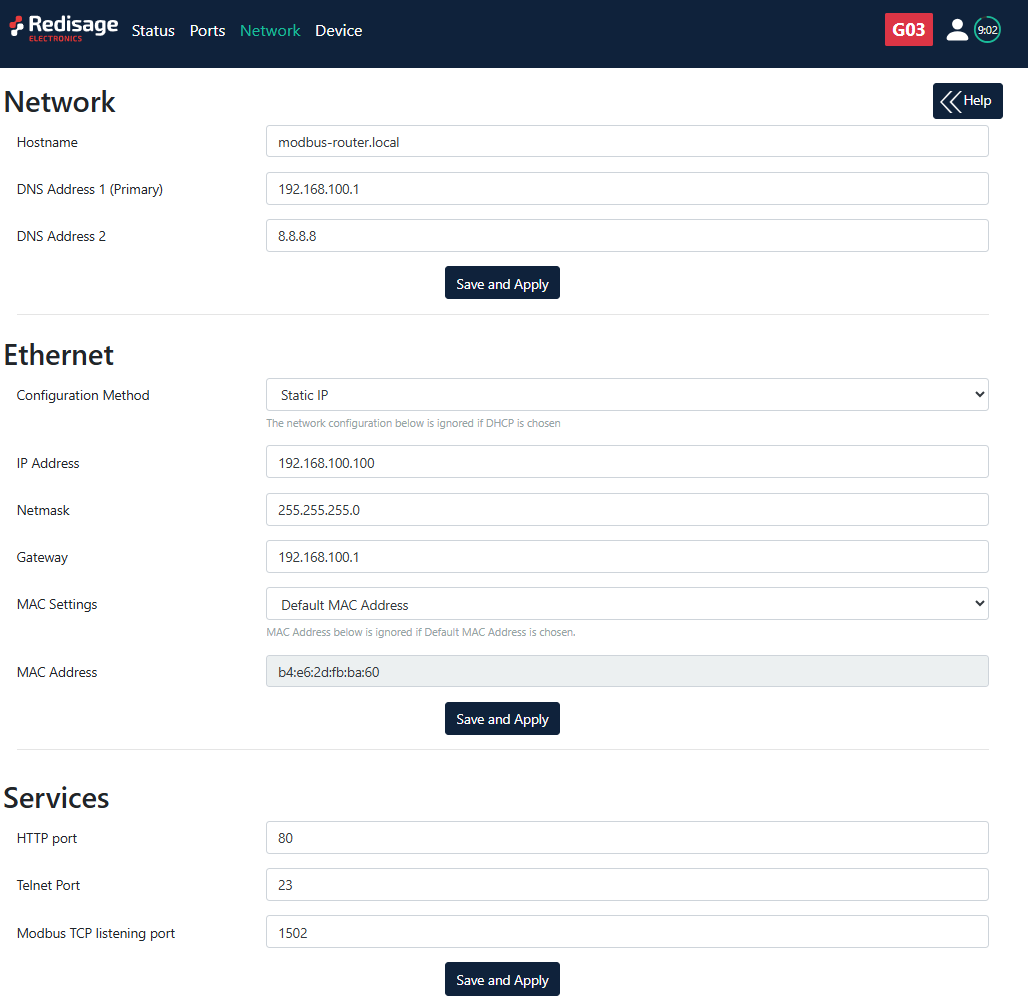](https://doc.redisage.com/uploads/images/gallery/2025-09/5ojimage.png) {{@175#bkmrk-item-description-hos}} It is possible to obtain dynamic IP address. Just switch configuration method from static IP to DHCP (automatic). This process may cause some issues with identifying converters in LAN unless there is an access to the device which is responsible for allocating IP addresses. Keep in mind that in case of changed IP address user needs to type new IP in the address bar and log in again.Make sure to save all the changes with “Save and Apply” button located on the bottom of the page.
### Device page On the device page there are tools used to a firmware update, a factory reset and a device reboot. There are also some information about the device. [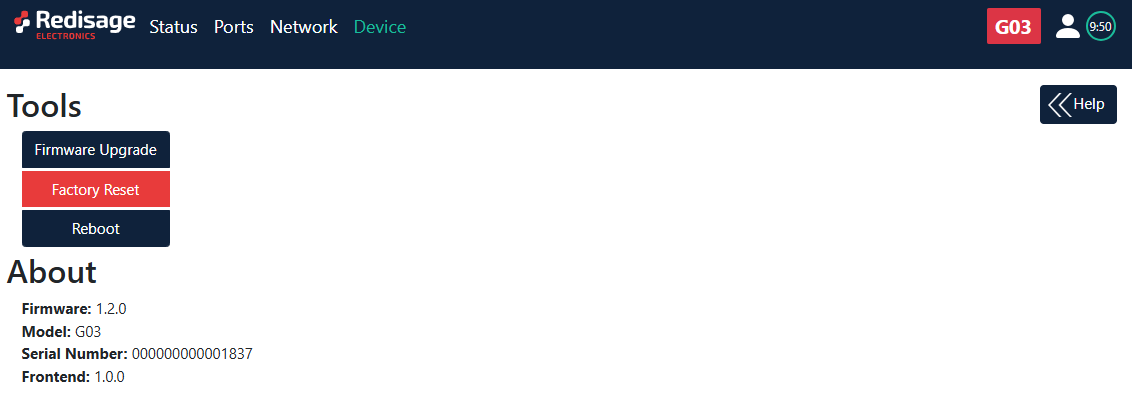](https://doc.redisage.com/uploads/images/gallery/2025-09/Kfrimage.png) {{@175#bkmrk-item-description-fir}} #### Firmware update The device firmware update must not be interrupted. Update the device only if experiencing issues, being instructed to do so by our support or requiring the latest features/bugfixes. Failure during the update may 'brick' the device and make it unusable. [](https://doc.redisage.com/uploads/images/gallery/2025-09/n7Eimage.png)Use the **modbus-gateway-mcu-esp32.fir** file for a firmware update.
#### Factory reset To restore default settings, press the red button. After that, user will be asked to type “RESET”. Then it will take a few seconds to reload the web page and restart the device. After reset use default login details (login: **admin**, password: **admin123;** default IP: **192.168.100.100**). [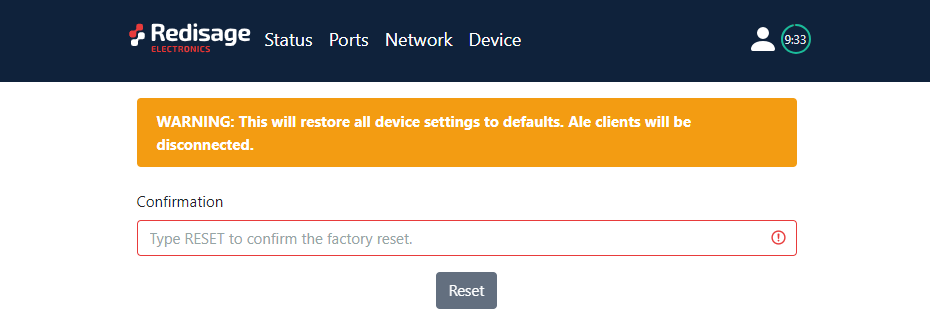](https://doc.redisage.com/uploads/images/gallery/2024-03/55a4fc0e-1fb5-4047-a4da-36cb709a988e.png) # Configuration by the Telnet Console ## {{@178#bkmrk-modbus-ethernet-gate}} The device can be also configured via the Telnet Console. Firstly, make sure that converter is connected to the power supply and to the LAN using a patch cord. Knowledge of the device’s IP address (default is **192.168.100.100**) and Telnet port number (default is **23**) is necessary to establish a connection. Use command below in a terminal window to connect to the device: ```bash telnetThe configuration is available only if devices are connected to the same Local Area Network as the computer used for it.
### {{@175#bkmrk-list-of-all-commands}} {{@175#bkmrk-command-description-}} {{@176}} ### Additional notes After some time of inactivity, session will be disconnected automatically. In order to avoid issues like connecting to host, type “help” to get more information. To get more details about every particular command, append “help” after each commands (example: "ipconfig help"). Factory reset is not available from the Telnet Console level. # Configuration by the Serial Console ## {{@178#bkmrk-modbus-ethernet-gate}} Another way to configure the device is via a serial console. In case of the G01 - G03 Modbus gateways an additional USB/UART converter is needed. ##### {{@177#bkmrk-procedure-to-enter-s}} {{@177#bkmrk-turn-off-the-power-o}} ##### {{@177#bkmrk-procedure-to-enter-s-1}} {{@177#bkmrk-install-stm32-virtua}} [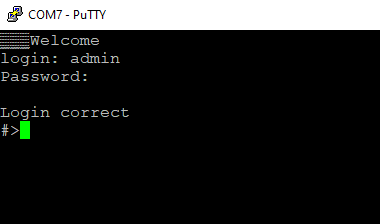](https://doc.redisage.com/uploads/images/gallery/2024-03/a5a95447-11ad-467f-afc0-dd83c392aa44.png) ### {{@175#bkmrk-list-of-all-commands}} {{@175#bkmrk-command-description-}} {{@176}} ### {{@177#bkmrk-service-mode}} ##### {{@177#bkmrk-procedure-to-enter-s-2}} {{@177#bkmrk-turn-off-the-power-o-1}} ##### {{@177#bkmrk-procedure-to-enter-s-3}} {{@177#bkmrk-install-stm32-virtua-1}} #### {{@175#bkmrk-list-of-commands-in-}} {{@175#bkmrk-command-description--1}}{{@175#bkmrk-in-the-service-mode%2C}}
##### Factory reset To restore default settings, type “defaults”. After that, user will be asked for type “default network” to reset the network settings as well. Then user will be informed if the process is successful. Default login details: \- login: **admin** \- password: **admin123** \- IP: **192.168.100.100** ### Additional notes In order to avoid issues like connecting to host, type “help” to get more information. To get more details about every particular command, append “help” after each commands (example: "ipconfig help").